Friday, December 29, 2017

Christmas Cake 2017

I did it! I actually got to the point of putting the final touches on the Christmas Cake that we started back in November. (That original post is here: Christmas (Cake) Is Coming!)

The only thing I didn't do is capture any video this week. It's amazing (though not surprising) how, when you're trying to put together final touches in someone else's house (my parents') with 14 other people around, you don't go through quite the same motions as you do in your own home.

Oh. before we jump to the end, I should mention that - as suggested in the recipe - I covered the cake in almond paste about a week before decorating and serving. That kind of went like this:

1) Search the grocery stores for almond paste.
2) Buy the wrong thing.
3) Go back to the grocery store for the right thing.
4) Open the package.
5) Wonder if it's actually the right stuff.
6) Decide to just go with it.
7) Forget to take a picture.
8) Get halfway done.
9) Remember to take pictures.

I mean, really, does that package look like it's going to turn into what's on the cake?
One of the packages was older than the other (it had a February 2018 expiration date, while the other had a September 2018 date). The "older" one had a slightly darker color and slightly grainier consistency, but the taste was the same. 
It looks like I'm working with a bar of really expensive almond soap... 
With a little release of aggression, you just warm it up and make it more malleable, so you can mash/spread/roll/press it out to cover the cake.

When I was done, it looked a bit like a failed art project of the moon. But - I promise - it smelled amazing.
Obviously, there is a dark side of the moon and a light side...
All done with the almond paste, I wrapped the cake up and set it back in our cool pantry for the week.

Then, yes, I carted the almond paste-covered cake to my parents' house in South Dakota for the Christmas weekend, and unwrapped it on Christmas Eve. Not much had changed since the almond paste got put on it a few days earlier.
Okay. Two obvious things changed: The paste had kind of mellowed in color and the cake had been moved from its parchment paper bed to a plate.
Still looks like a map of the moon, though.

I had been told - both by my friend in England and by my mother - that the cake definitely needed to be decorated. I'm not a fan of fondant (which is recommended in the recipe), so I went with my mother's recommendation of "at least a quarter-inch of buttercream icing" on top.

This meant that I needed frosting - and a way to apply it.

My buttercream recipe is really probably not buttercream. It's just a very basic everyday frosting, with three main ingredients: powdered sugar, some kind of shortening/fat, and milk. (You can add colorings and flavorings if you want - but remember that they may alter the consistency of the frosting.)

I don't really pay attention to the amounts - I kind of do this by "feel" based on how I'm using the final product.

Looking at the picture, I'm guessing I used about 3/4 of a two-pound bag of powdered sugar, about 2 tablespoons of softened butter, and enough milk to get the right consistency (through trial and error - adding more powdered sugar, if needed).
You can see my food colorings (old school liquids in droppers), and almond flavoring to the left of the bowl.
I really thought I had taken more photos of the frosting-making process, but... well... I didn't. I do know that I split it basically into 1/2, 1/3, and 1/6 amounts, so that I could create green, white, and red globs of frosting.

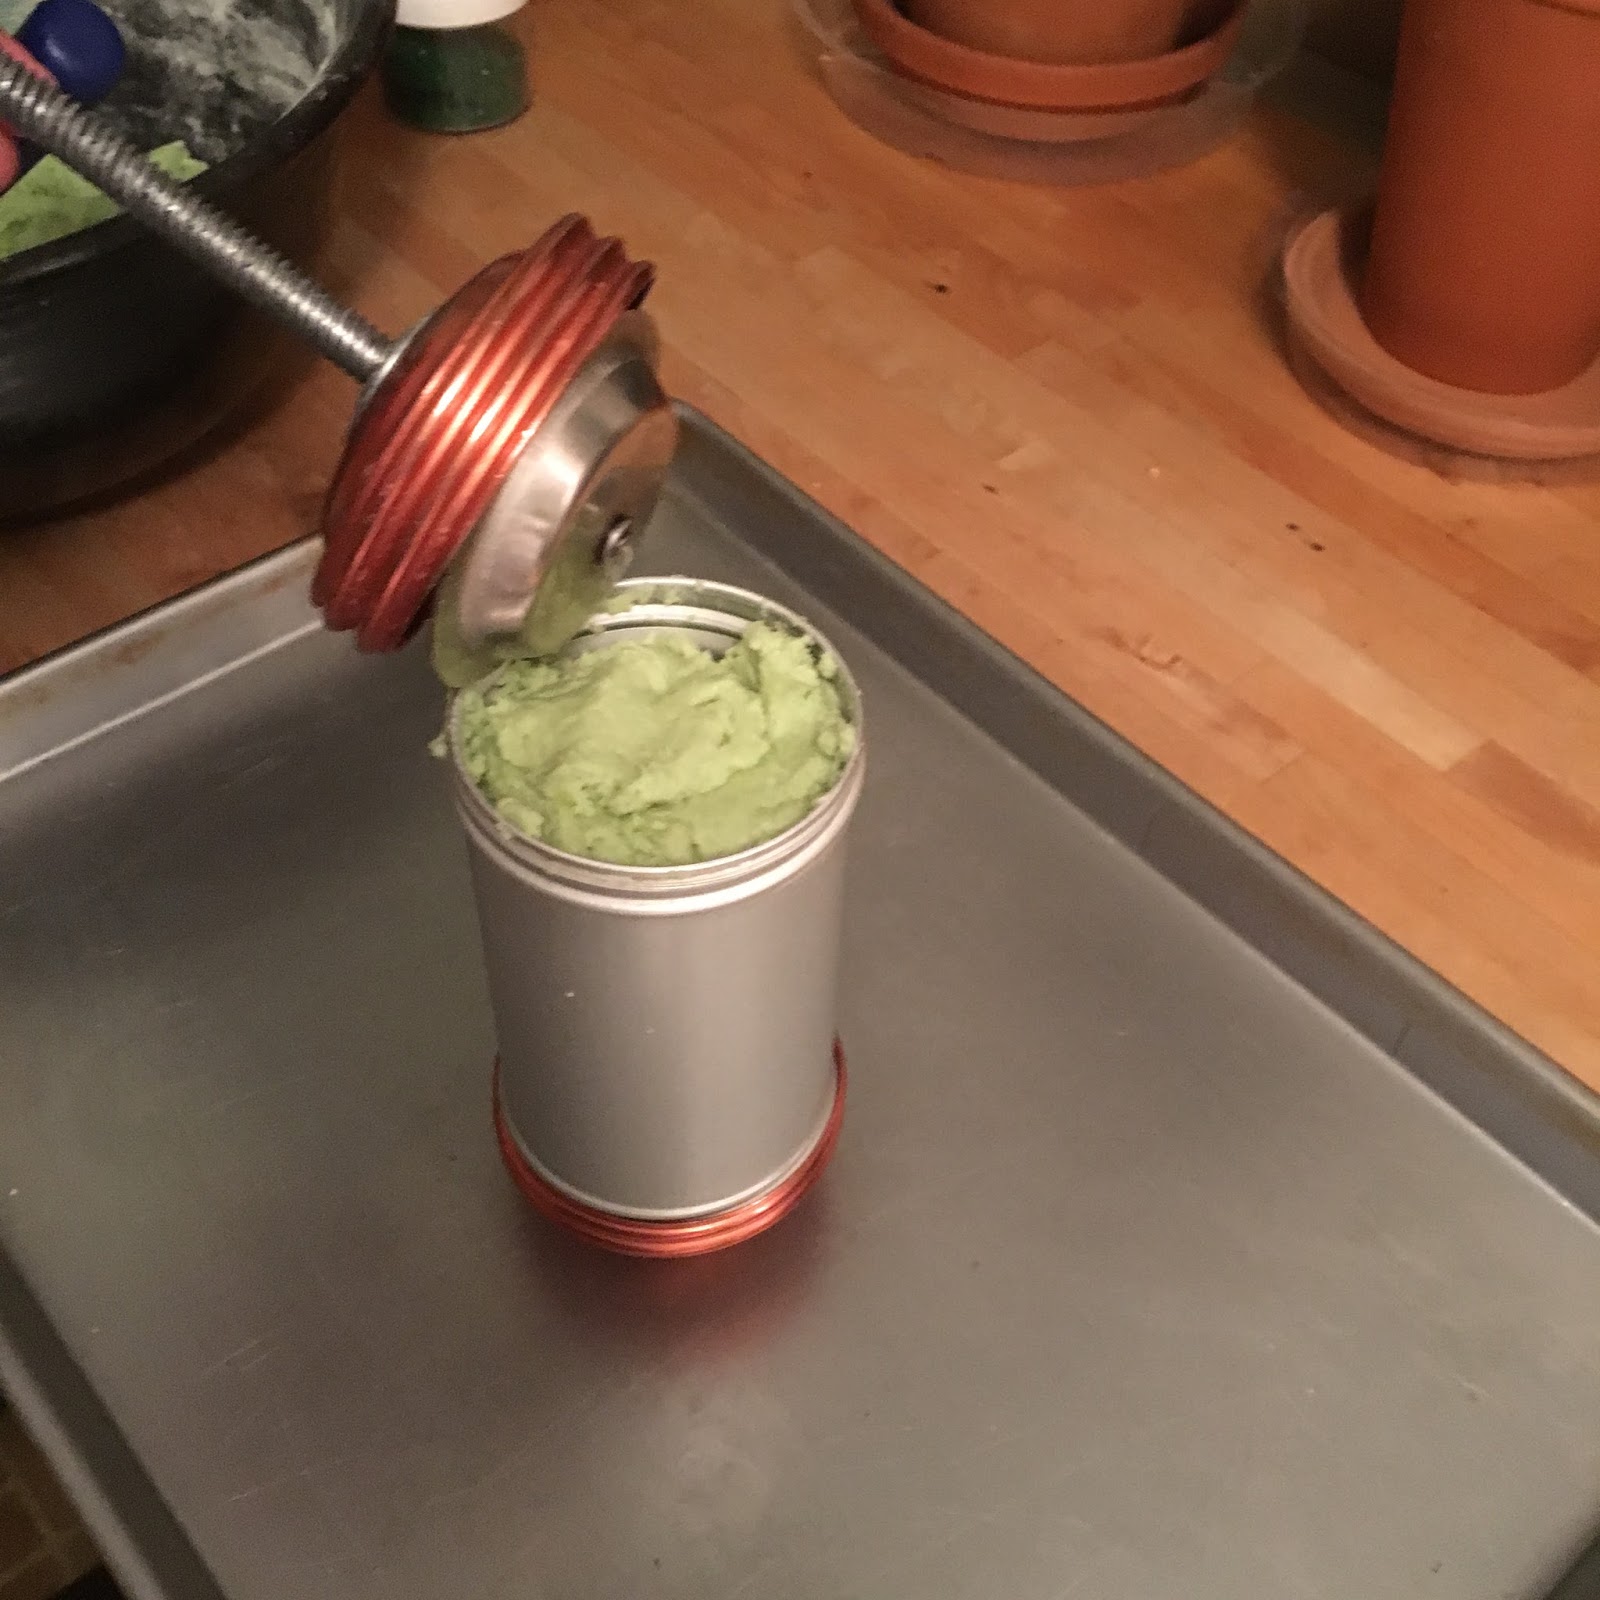
Do you remember the Spritz cookie "gun" that I have? I have a matching icing gun, and I love it equally as much.

As with the Spritz gun, you put a tip on the bottom, fill it from the top, and then attach the plunger. In this case, it looks a bit like a huge syringe:


I probably should have enlisted one of the 14 other people in the house to take pictures of me decorating the cake (or at least have done some "in-progress" photos), but instead you have to assume I'm the one who got it from that point to this:

From the side - which remains unfrosted, per tradition - you can see the layer of almond paste and the layer of buttercream on top of the cake.

And, yes, I got that in a close-up:

About an hour after frosting it, we cut into it. My mother guided me on the fact that you cut it "in rings" and so I did that.

How was it? Well, everyone who tried it seemed to enjoy it. I found it to be a little dry (which seemed incredible, considering how much brandy I'd poured onto it in the past month), but I wonder if that was because we were working on the outer edge, and not the center.

Will I do it again? There's a very good change that I will. I enjoyed the overall process - and the flavor was very nice - a dark, "warm" flavor, even though it was a bit hard to really put a finger on.

And so the Christmas Cake story for 2017 brings this year to a close.

As we enter 2018, here's to whatever the new year brings! (Will it be cake? casseroles? cookies? conversation? Only time will tell!)

-----
How are you celebrating the new year? Will you be having a feast of seven fishes? champagne at midnight? cocktail shrimp skewered on toothpicks in a grapefruit centerpiece? Let me know what you're up to - and I'll see you in a week!

Friday, December 22, 2017

"Almond Bark" Candy - Quick and Easy Christmas

Since last week's fairly easy recipe had a few issues (one of you actually commented that it looked like what had happened was that I had boiled the syrup to the "hard crack" stage - which is probably exactly what happened), this week I went for foolproof - and fast.

From start to finish, it will probably take you longer to read/watch this post than it would to make these treats (assuming you don't have to go to the grocery store for ingredients right before a major holiday, at least).

What are we doing? Let me explain:

Do you ever find that you have no idea how to describe something that you know really well? Yeah... sorry about that. Let's get into the "recipe" and try to clear this up!

First of all, as promised, there are only three ingredients in this: peanuts, mini marshmallows, and almond bark.

If you're not sure you'll like this, you could start with a smaller amount, but I just dive straight in and use the whole package, since I know that I'm always going to find people who like it.

I start with my makeshift double boiler. (If you're working with a microwave, you'll want to follow the directions on the packaging - we don't have a microwave in the kitchen, hence the double boiler.)

Covering it will hold the heat in and hurry the melting a bit.
Unfortunately, it makes it really boring to look at.
The first signs of melting seem to take forever. But, with a metal bowl, you can see how the heat is conducted through the bowl to the candy.

I find that pushing down on it from time to time (forcing the blocks to make more contact with the hot bowl) helps the melting process.

There's a point when, as you're stirring, you'll find that it has just all gone liquid. It's kind of sudden, really, and it's a great feeling. (For me, that took about 15 minutes.)

Now comes the fun part: adding things in. I'd love to give you exact amounts of what goes in, but the trick is that what you're using will always catch more (or less) of the coating. So it varies based on the shapes of what it is.

What I can tell you is that you should always start with the non-marshmallow ingredient (for me, that's typically salted peanuts). This is so you temper the coating a bit so that it won't melt the marshmallows when they go in.
What do you think? Maybe a cup of peanuts? Maybe 1 1/4 cups?
Once you've got your first ingredient in, you'll want to add about the same amount of mini-marshmallows. (Or at least that's the ratio I go with. If you'd prefer more salt than sweet - or vice-versa - that's entirely your option.)
Remember - if you add the marshmallows when it's still really warm they'll melt. 
When you're stirring, you're hoping to reach a point where the coating is basically all taken up by the fillings. If you've got a big puddle of it in the bottom of the bowl, you'll probably want to add more fillings so that no one ends up with just a block of white confection.
Can you see how there's almost none left on the sides of the bowl? 
I use my small ice cream scoop for these (yes - the same one I use for a lot of cookies). I don't worry about them all being the same size, though - I just use that so that they'll be about the same size, and so that I don't get too much of it on my hands.

You'll want to put these out on waxed paper, so that they don't stick. (If you wanted to make a "bark" out of these, this is when you'd spread it out on a sheet of waxed paper and simply let it harden.)
So cute, right?
Depending on how much of the fillings you put in, you'll get different numbers of these, but I think I got about 5 dozen from my batch.
See how different they are in size? Perfect for a crowd, so that people can choose the size they want!
Pretty easy, right?

So, there we have it. An actually quick, easy, host/hostess gift.* Or a very simple (yet massively crowd-pleasing) candy to serve at a party this weekend - or maybe for New Year's. Or - heck - tint them pink and serve them for Valentine's...

Before you run off to the store to pick up the ingredients (either to make these treats, or to have the ingredients in the pantry, just in case), let me just wish you a Merry Christmas - and I'll see you in a week!


*Note: there is a comma between "easy" and "host" - I am not implying that this is a quick gift for an easy host. Though - who you party with is entirely up to you.


-----
Do you have a New Year's food tradition? Something you eat for luck - or just because you grew up with it? I'd love to hear about it! Let me know and we can talk about it in the next week or so!

Friday, December 15, 2017

Seasonal Satisfaction - Special K Frosted Chews

I think everyone has a recipe that really makes them think of a specific place and time. These chocolate-coated peanut-buttery bars are one of those for me. 

In the far reaches of my mind, they take me to when I was growing up and we would eat them every fall. Once I moved away from home, they became a Christmas food - not because they are intrinsically Christmas-y, but because they are tied to family. And, for me, family and Christmas go hand in hand. 

The official recipe is from the folks at Kellogg's, but my family refer to them as "Joy's Frosted Chews" because our friend Joy is the one who made them every year. 

The ingredients are pretty basic (though you do need to use the Special K - I've never tried them with anything else, because I like the way the Special K holds up against the moisture of the peanut butter mixture). And the main technique you need to know is how to stir things.
Seriously. That's all of the ingredients (surrounded by everything else I've been using for the past week).
Oh. And the recipe is here:


As usual, it's best to start by getting your ingredients together:
Three ingredients, three kinds of cup measure...
...and one really big measuring cup for the cereal.
I really thought, at this point, that I was moving along well. I'd measured everything out in advance, I'd turned on the stove and poured the sugar and corn syrup into the pan...

And the mixture had finally started to combine, instead of being two very separate components.

Yet, something seemed to be missing. What was it? Oh... Right... An explanation of what was going on. Let's jump back to that for a moment:

Okay. I feel better now.

The sugars are doing their thing on the stove, so it's time to grease my pan. (Later on, you'll see that I made two batches of these - but I did do them one at a time.)

Oh - as is written on the recipe, I still use a "jelly roll" pan (technically, mine is a half-sheet pan/cookie sheet) instead of a 9x13 cake pan. I like the way the bars are a little flatter - but also serve more people - this way.
I think we've talked about this before: I pretty much always use "butter papers" when greasing pans. 
There's a kind of amazing moment when the sugars go from just barely bubbling around the edges to a full rolling boil.

Once it gets there, the heat gets turned off, and you stir in the peanut butter. (In the past I've accidentally added the peanut butter at the beginning, instead of waiting for it to boil. That's *not* a good thing. Luckily, I didn't do that this time...) (Consider this to be foreshadowing.)
The stirring is a little odd on this. The peanut butter doesn't melt instantly, so you start by kind of stirring the syrup around and through the peanut butter, and gradually the peanut butter melts and they combine.
I tend to use a large saucepan (this is a 4.5-quart pan, I think), because it gives me room to go directly to mixing in the cereal without having to transfer to a bowl in between.

What you're looking for, here, is a good coating over all of the cereal. It can take a little while - but you want to do it quickly, so that the syrup mixture doesn't cool.
This is why you want either a really big pan, or a huge bowl.
Once it's mixed together, you dump it out into your prepared pan...

Which should give you a nice, relatively evenly coated mound o' Special K:

Of course, you don't want a great big mound of this in your pan, so you need to flatten the so-hot-it-will-burn-your-skin mixture into the pan. I tend to use the back of a sturdy spatula to do this. I've tried other tricks (like putting your hand in a plastic bag), but since the heat remains a major issue, the spatula seems to work best. 


At this point, the pans need to cool long enough that the top layer won't just melt off. This time of year, I use our screen porch - I just have to remember not to leave anything out there so long that it freezes.
Here we have the proof of the two batches.
While the base cools, it's time to make the topping - which is even easier than the base. (Note that this is the topping for two batches - if you're only making one, you won't have this many chips in the bowl.)
There's a prime example of "chocolate bloom" going on, here. Can you see the different colors of the older (slightly grayer) and newer ("brighter") butterscotch chips? "Bloom" typically only impacts the look of chocolate, not the taste, so don't worry too much about it unless you need pretty chocolate chips or something.
I think we've probably discussed the fact that we don't have a microwave in the kitchen. (And, anyway, I used to know someone who said "Microwaves don't melt chocolate, they burn it.") So I use a makeshift double boiler (a bowl above above a pot of hot water) to do the job.

In case you want to do a science experiment, the butterscotch chips tend to melt faster than the chocolate ones. But I'll leave it to you to explain why.

It feels like it takes forever for the melting to really begin. But, once it does, it goes pretty fast as long as you keep stirring.

I feel like I should have an action shot of me pouring the chocolate on and mooshing it around, but you'll just have to believe that I did it.

And, there we have it: a pan of Frosted Chews.

Sort of.

This is going to take some explanation - two videos' worth, in fact:


So, yeah, when things go right, the bars look like this, with a layer of crispy, chewy peanut butter, and a layer of butterscotched chocolate.


I don't actually have a still photo of how they look when things go wrong. (I honestly tossed the entire batch into our compost bin before going to bed that night.)

If you're thinking "I'm sure they were salvageable, let me assure you that they weren't:


And there we have it: food memories on a plate (or at least in a pan):
Remember when I mentioned during the Spritz post, that I kind of have a set routine for what I make first and what I make last? These bars can dry out pretty quickly, so I typically make them pretty close to when they're going to be eaten. I cut them as late as possible, too, and keep them tightly covered at all times.
As I mentioned in one of the above videos, I may or may not be around the next couple of weeks due to the holidays. (And I'm guessing you'll be pretty busy, too.) I'll try to put something together, though - possibly something quick for a last-minute hostess gift kind of thing. (Hmm...)

In the meantime - enjoy this crazy season. Light some candles in the darkness. Wish on a star or two. And take some time to enjoy it all.

------
Just because it's the holidays doesn't mean that I don't want to hear from you! Is there something you're considering making as a tailgate food before the playoffs? Are you getting ready to hunker down for the brutal cold? What's your go-to food for either of those? 

Friday, December 8, 2017

Diving Headlong Into the Holidays - Spritz Cookies

As we plunge into the holiday season, there are a number of things that I expect to have to eat (or drink): candy canes, red-and-green everything, egg nog, and a whole bunch of cookies.

My time in the kitchen this time of year (as you might have already guessed) tends to be focused on baking a few dozen of those cookies. (Well... maybe a few dozen dozen would be more correct.) And I have a pretty set routine for which ones I make first and on down the list.

In case you're wondering, I start with the ones that don't mind getting a little dry over time. Not that you want them to get dried out, but just that they don't have to be chewy for them to be good. Where does that mean we start? Let me explain:


Now, first, here's the recipe:
The recipe actually came with my cookie press. It's the best recipe for these I've ever found, so I figure why mess with it?
I have a note on this that says "Will make 5 dozen wreaths or about 3 1/2 dozen trees."
The part of this recipe where we put the ingredients together is pretty easy, so we'll go through that quickly.

A quick note about the Gluten-free version of these (or any baked good, really): If you're baking for someone who is allergic to gluten (and doesn't simply prefer to avoid it), you'll want to check all of your ingredients - including the vanilla and food coloring - to make sure there's no gluten in them. It shows up in some really odd places. 

We have the ingredients:
You might notice that there are two eggs in the picture. Yep. I doubled the recipe.
We cream the shortening (margarine for this round) and the sugar:

We add in the eggs and vanilla - and the first round of food coloring:
Sorry. I realize that the green food coloring looks a bit odd in this picture. 
Then come the dry ingredients (and the realization that we need some more food coloring): 

The last of the flour goes in at about the same time that I decided the color was where I wanted it to be.
I started to make these in my mixer, but these are so easy to do by hand!
And voilà - cookie dough!

So now we get to the fun part - working with the cookie press.

Before you load in the cookie dough, you want to choose - and place - your cookie-forming plate. (In case you're wondering, it gets held in place by some metal "bumps" on the inside of the copper ring.)

Next, the dough goes in through the other end.
You can put in a whole lot of dough - and you want it to be fairly packed in. Air bubbles can cause weird issues when they come out through the plate.
Once the press is filled, you line up the "lid" and screw it on so that the plunger comes up against the dough.

I probably should have mentioned that you want the plunger all the way up into the lid at first, so that you can turn it and push the dough out through the other end. (Am I over-explaining this? I feel like I'm over-explaining.)
I love how retro this contraption looks (and is). I bought this one probably 25 years ago - but it's exactly like the one my mom has that I used when I was growing up!
When you turn the plunger, it will start to push the dough out through the plate.
(It's the same process as making extruded pasta, really - or extruded metalwork, for that matter.) 
Okay. Here's where the issues can come in with not enough or two much dough coming out. In this case, I didn't get enough dough out before I lifted the press. So parts of the wreath stuck to the press, instead of to the pan.
It's almost an action shot!
If it had been really bad (like more than half of the wreath not working), I'd have tossed the dough back into the bowl and used it in the next round. As it was, though, I just kind of mashed it back together.
The wreath in question is the right-hand one in the bottom row.
I can easily get 5 rows of 7 on my cookie sheet. They do spread a little, but not too much.
Do you see in the photo that no dough is coming out through the plate? To stop it, you just have to twist the handle about a half-turn "backward" and then you're good to (not) go.
 A sprinkling of sugar, and the first pan was off to the oven.

Second pan - I seem to have gotten a bit heavy-handed with the press, but I have a solution for that...

Cherries!
I feel like I have to say that you want to use a cutting board for these. You definitely don't want to use your thumb as a backstop for pushing them across the knife. That would be very very bad. Don't do that.
If you're being really festive, you can mix and match the colors of the cherries and the sugars.

When they come out of the oven, the bottom edges should be just barely turning brown. 
Remember: we put the red-sugared ones in before we worked on the green-sugared ones. They didn't change color in the oven.
And then, for variety, you can switch to another plate (the set has close to a dozen in it - including all four playing card suits, a butterfly, and something that looks like either a dog or a camel).
Remember how I mentioned that there are bumps in the metal that hold these in place? There are also three "feet" that keep you a consistent distance off the pan. Try to keep your plate situated so that those don'e interfere with the design.
Of course, you can mix your sugar colors, too, for some variety on the cookies.

I love how these all look pretty, even though they're all slightly different.

I feel I should admit that I may, once, have had a friend over to help make these and... well... I may have gotten very particular about the sugaring of the cookies. That was a number of years ago, though. And I'm much less strict about it now. Life - and the holiday season - are way too short to worry about perfect sugar on a cookie.

And there we go! All set for Santa - or whoever else may show up at your chimney (or your door).

So, how did I do?


Oh. Before I go, there's one quick thing about clean-up that I feel I should mention. The sugar tends to get everywhere. If you've got a porous countertop - or if you're just really picky about how things clean up - you may want to put down some paper on the counter before you begin. Among other things, when the sugar gets wet it melts - which can stain.  So be careful with this.

And, of course: Enjoy!

(You know what else you might enjoy as we head into the holidays with family? A blog post about writing memoirs! If nothing else, maybe the idea of writing about your relatives will make getting through the tense moments a little easier. And I just happen to have posted something about that topic last weekend, here.)

-----
What gets you into the holiday spirit? Is it a cookie? A spice? A change in the weather? Let me know what helps you find your holiday happy and I'll see if I can work it into a future post!