Friday, February 23, 2018

Cinnamon Streusel Coffee Cake

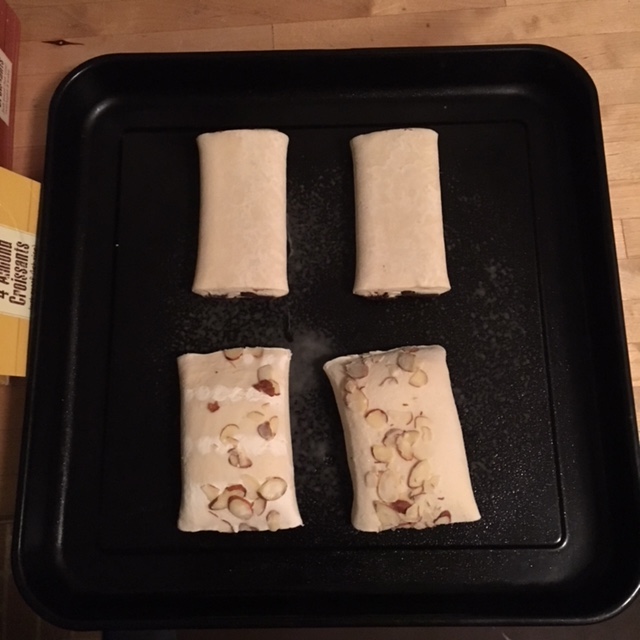
Spoiler alert - in case the name of the post didn't clue you in already - this is what we're aiming for in this post: 

Allow me to explain why a coffee cake (which is typically made in a 9x13 pan) looks much more individual-size in that photo: 
(So, Mom, any idea where the recipe came from?)


Do you ever watch those cooking shows where the chefs really want the average people to do good mise en place and also keep really clean and tidy cooking stations?

Well, at least I've gotten better at amassing my ingredients and doing the really basic portions of the mise en place...
No, it's not your imagination. The egg on the right does have a dent in it reminiscent of the side of the Death Star. (Once I noticed that I tossed it and got out a non-pre-cracked one.)
 Step one: Creaming the butter and sugar.

Step two: Adding the milk and eggs.

Step three: Adding in the flour (half at at time), salt, and baking powder.

Yes, I know that the recipe simply said to mix up all of those ingredients, but it just felt better to do it in stages.

Though... it didn't really look all that great:

Somewhere around this point, Christopher walked through the kitchen and I admitted that possibly using the mixer would have been faster. (And you all know how seldom I say things like that.)
It did turn out pretty well, though.
Now came one of the more challenging bits: getting the waxed paper to stay still while trying to scoop batter into the pan. I'm really glad I chose the scoop, though, because I'd never have been able to use a spoon - which I would have had to scrape each time.
If I didn't have this pan, I might have tried lined cupcake pans. 

The batter will spread when it heats up, but in order to get a relatively even "streuseling" I wanted to get it pretty close to the corners from the outset.

Oh. Wait. The streusel! How could I forget!?
Don't worry. I didn't actually forget. 
If you wanted to put together ingredients that look like late fall, I think brown sugar, cinnamon, flour, and butter would be the ones:

A quick mix, and this all comes together pretty fast.
I know that it looks like brownie batter, but it smelled like cinnamon heaven.
You're supposed to "sprinkle" the streusel over the top. But - as you might have guessed from the photo above - this isn't exactly conducive to sprinkling. So I kind of pick up small amounts of it and roll it back and forth between my fingers and thumb to get it to drop onto the batter.

(I mention in the wrap-up video that I changed things out just a little in this step. In a larger pan, you would spread out half of the batter, then do a scattered layer of the streusel, then the rest of the batter, and finally the rest of the streusel. For these shallow pans, I just did one layer of each.)

Here's what they looked like at the halfway point.
This is why I always end up opening the oven door to take photos. 

*So* much easier to see when you're not photographing through the window.
I don't mean to get ahead of myself but, while the first batch was baking, I added some raisins to the remaining streusel to be used in the second batch.

I took the first batch out of the oven after about 14 minutes. The recipe - if working with a full-size pan - calls for about 25 minutes. But I did the finger test (bouncing your finger on the top of them to see if they spring back) and these were definitely done.
One caveat: The brown sugar/cinnamon/butter on top of these is pretty much molten lava when it's in the oven. Be very careful when you choose which areas to test with your fingertip.
The waxed paper "handles" did a great job, and all that was left on the pan was some of the over-spill streusel.
It's probably just me, but does that look like some kind of old-school video game layout?
Here they all are, with their "handles" still attached.

You can see me remove some of the waxed paper in the wrap-up video (it came off really easily... mostly), but here is the aftermath:
Why do I say only "mostly"? Because in some cases the sugar had already hardened and attached itself to the waxed paper. There are a couple of "torn" cakes as a result...
 Tell me, now, is that a cute little breakfast square, or what?

And just look how tasty that looks when you open it up! It's spongey and cinnamony, springy and full of warm flavor.

The second batch - because the raisins held the streusel in place a little better (I think - at least that's my theory), had a more centralized streusel look when it came out of the oven.

On the plus side, people should have no trouble guessing which is which!

If you scroll up to the earlier one, you can see that the raisin streusel really stayed in place, and kind of "sank in" as opposed to the way the regular streusel sat on top of the batter and rode it out that way.

So, how were they (aside from being individually sized)?
*Note: I did not decide to glaze them after all. They seemed fairly moist without it - and I have the feeling they'll be easier to eat in a meeting without that.

Oh, and, yes, by the time you're reading this, they will have been served at my work meeting. If anything goes horribly wrong - or incredibly right - I'll update this and let you know.

UPDATE: These little hand-sized coffee cakes were a HIT! They flew out of the tray during our meeting, and by the time I was back to my desk there was only one left. Since most of these ingredients are probably in your pantry - maybe this would be a good weekend to see how happy you can make the people in your life. 

-----
Have a recipe you want me to try to miniaturize? Or something you've always wanted to try but were slightly afraid to? Maybe something you're considering taking to work? Let me know! I'll gladly try to put it together and share it in a future blog post!

Friday, February 16, 2018

When the Brownies Go Too Fast

I'd love to be showing you photos of the brownies I made last night. (Granted, they weren't from scratch, they were from a box, but we all know I wouldn't hold that against them.)

A few years ago, I started making them in mini-muffin tins, so that you end up with "brownie bites."

Christopher isn't sure about my brownie bites. And I completely understand. There's a very short window of time between done and overdone. And they can end up feeling almost a little dry because there's so much exterior exposed to the pan. After all, crunchy/crispy exteriors are great - but dry interiors are not.

But I like to make them - and friends seem to enjoy them.

Last night, unfortunately, I got a bit distracted while making them and forgot to document the process. And then I packed some up for shipping. And… well… we may have eaten most of the rest. Which left me with the possibility of a photo of an unwashed bowl, which I opted against.

So, instead of sharing those brownies in all their glory, I'm offering you this image which I found while working on a project at work this week:

Apparently "purple squirrels" are a hiring thing. Who knew? 
I shall try to be better prepared next week - and add my camera to my mise en place list.

In the meantime, enjoy your leftover Valentine's candy, your non-meat Lenten Friday, and - frankly - any other food that might make you happy (like slightly over-crispy brownie edges).

And... I'll see you in a week!


-----
Have anything you'd like me to put together in my kitchen - assuming I remember to also document it and post about it - let me know! 

Friday, February 9, 2018

Product Review: Trader Joe's Frozen ("take-and-bake") Croissants

A few pieces of background info that may help this post make more sense:
  • I lived in Paris for a year between college and grad school and became mildly addicted to pretty much every bread-based product available. 
  • I really enjoy lazy weekend mornings with Christopher (and pastries).
Oh, and...
  • I am a glass-skeptically-half-full diner when people tell me that some quick and easy frozen food product is as good as the real thing.
Thus, when I found a social media post online stating that a frozen, heat-and-eat croissant was as good as the real thing that takes hours of pastry-making time, I was understandably intrigued - and also afraid to get my hopes up.

Having seen the post - and with a Trader Joe's between work and home - I decided to try these mythical beasts out and see how they were.

They looked fairly promising in the store, so...

Let me explain what happened:

**NOTE: They were $4.49 for a box of 4 - not $3.

The package they come in is small. Like, scarily small. Four croissants in a box that is the size of about one and a half traditional pain au chocolat? That did not seem to bode well. But the price was good - and I knew I could blog about it - so I figured what the heck.

I went ahead and bought a box of each - one chocolate and one almond (see above).

In case you're really wondering about these, here is the basic "recipe" from the back of the box:
With their 9+ hour wait time, Christopher declared them a bit putzy.
As you might expect from the boxes (and the video), these started out pretty small. Small enough to put four of them on the pan that goes into our toaster oven.
Okay… they were supposed to be multiple inches apart. I cheated on that.
I mean… really small:

Yes, I got out one of our kitchen rulers. Basically, I wanted to be able to do a before-and-after comparison. This is obviously the "before."
And flat. Geez. They were flat.

So, I left them on the counter - uncovered - for the night.

(Next time, I might at least put some waxed paper loosely over them. It felt kind of strange to not even do that.)

You're supposed to let them proof for about 9 hours. I think these probably sat out for about 10.5. (I started them before getting ready for bed, and then didn't bake them right away in the morning.)

They rose quite a bit:

I feel I should mention that our house goes down to about 60 degrees at night in the winter - and the counter in the kitchen is near a window that gets even cooler when it's Zero degrees outside.
Following the recipe, I beat up an egg to baste the tops of the croissants before baking.
I apparently didn't shoot that one as a square. Weird.
Action shot!
One thing confused me a little with this. The baking instructions talk about not taking them out of the oven when they are light brown and having to wait until they are dark brown.

Here's the thing: They brown more with the egg wash on them (as well as getting shiny). So they may not get as brown if you don't use the egg. Also, I feel like I'm wasting egg when I have so much left in the bowl after basting.

It's a conundrum.

Either way, though, they did rise even more in the oven, and came out a very respectable size.

You can see that the almond oozed out of the side of one of them a bit - it actually happened to both, you just can't see it because of the ruler.
They were admittedly very pretty when they came out - and the house smelled amazing.

The hardest part was letting them sit on the pan for a bit to set up. (Because puff pastry may "deflate" if you cut into it too soon after it's out of the oven.)

So, how were they?

Well, the one I cut looked like this (for about 5 seconds):
Fair disclosure: One of my favorite foods of all time is an oversized almond croissant that is still warm from the corner patisserie. (Mon dieu! I'm literally salivating while thinking about it!)


Yeah. I admit it. I was incredibly impressed with them. (Even at $4.49 for 4 - not the $3 that I keep saying in the videos.)

Christopher's opinion (which, honestly, was probably less emotionally invested than mine was) was also favorable. He didn't rave about them, but he did say they were a good approximation of a patisserie-born pain au chocolat, and that he'd happily eat them again.

And, for now, I think these may become a new Trader Joe's staple in our freezer.

-----
Is there a product you've seen that you're too scared to try - and want me to try instead? Or is there something on the market you really want people to know more about? Let me know and I'll see about reviewing it in a future post!

Friday, February 2, 2018

Getting a Bit Cheese-y

With the Super Bowl upon us (and, living in Minneapolis, it really is pretty much upon all of us), it's time for some appetizer-y finger foods. And, I'll admit it: for me, planning for any group event that isn't a sit-down meal means that there should be an abundance of finger foods.

Having a brunch? I love to have a couple of "breakfast casseroles" but also things like scones that can be picked up as you walk past the table. Having a non-sit-down dinner? Along with the foods that need knives and forks, I always make sure there are snacks or sides that can be picked up as you go to the kitchen for another drink.

I don't know why I feel that way - maybe it has to do with the fact that my parents used to host Bridge nights, and so the food always had to be portable and easy to work with while guests' hands were also holding cards.

At any rate, let's get into the non-meat of this post:

So, what kind of cheese-y leftovers do we have in the fridge that I'm trying to work my way through? Here's a sampling:
The "Dimock Cheese" is from a small creamery in Dimock, South Dakota, where we've been watching cheese get made since I was a little kid!

The other fun thing about this post is that I get to get out the food processor that we almost never use.
We do not have video of me trying to remember how to get the lid on so that it works… Honestly, why can't these things be intuitive?
As I mentioned in the video, the one thing that all of the online recipes seemed to have in common is that they combined 8 ounces of softened cream cheese with 1 cup of shredded cheese. I was going to start shredding and measuring, until I noticed this on the bag o' cheese:
Oddly enough, I didn't use any of the pre-shredded cheese during this post.
Starting with the blue cheese, I trimmed the edges (we've had it for a while), and then weighed it.

Then I added some of the Habanero Jack.

Because these are both soft cheeses - and because we didn't have much Jack left at this point - I added the rest to the stack.
I figured that the soft cheeses would do fine together - I was right.
Into the food processor to see what we can do with soft cheeses and softened cream cheese.

I ground up the other cheeses, first (figuring that this was the best way to remove lumps)…

…then added in the cream cheese.
I really thought they'd just mush up into a wad. I was kind of amazed by how it came out.
At this point, when I opened the lid, I realized why so many recipes call for things like nuts or green onions or something with color and texture.
Is it mashed potatoes? Is it frosting?
The smell, though, as I scooped it out of the processor and into a bowl was definitely blue cheese.

Next up? Figuring out what to do with the Pepperoni cheese…

Okay. First, I washed out the food processor and set it to dry, then I looked at the cheese a little more closely.

The Pepperoni cheese includes a mix of "Italian herbs" - listed on the package as primarily Oregano, Basil, and Garlic. Since I was going to be adding this to the cream cheese (and, thus, mellowing the flavor), I decided to add in some of each of those - as well as a little Parmesan. And - just for kicks - a little extra Pepperoni.

I chunked up the cheese, first, before dropping it into the processor.

Then I let it whiz around for a bit, and got this:

Finally, I tossed in some quartered pieces of pepperoni and the cream cheese and herbs.

When I removed the lid from the processor, I could still see some pepperoni chunks - and the herbs were really fragrant.

Again, I scooped it out into a bowl, and then set it outside in the porch (high temp on the day I made these was predicted to be about 30, so the porch was kind of fridge/freezer temps), so that it could also set up enough to be worked with.

Once they were firm enough to not just be mushy (technical terms abound!), I was ready to move on to shaping them.

For the Buffalo-blue log, I opted to add some nuts to the exterior (for texture, as well as the kitsch factor), so I tossed a large handful of pecans (taken from the freezer) into the food processor and pulsed them a few times until they seemed like they'd easily stick to the cheese.

I scooped the cheese from the bowl onto some plastic wrap, which I used to help me shape it into a log without getting too much of it on my hands.

I put some nuts on the plastic, then rolled the log around and pressed the nuts in a bit so that they would stick.

A quick, tight wrap in the plastic, then I put it back out in the porch to re-solidify.
Honestly, it never got much harder than a block of cold cream cheese.
For the Pepperoni, I decided to go for a ball, instead of a log. But the overall tactics were the same: I put some of the herbs and garlic onto a sheet of plastic, shaped the chilled cheese into a ball…

…and then rolled the ball around until it was mostly covered.
No, I didn't coat it in pepperoni. I did seriously consider it, but wasn't sure how it would look after the meat started to dry out…
A tight wrap in the plastic (I must admit, this got much smaller and more compact as I worked with it), and the Pepperoni ball went out into the porch to chill with the Buffalo-blue log.

So, how did they turn out?

The one thing I found with this is that some bites were more "blue" and some were more "Buffalo." I suspect this was because I only let it set up for a couple of hours. The Pepperoni ball - which had a longer time to "cure" before being cut into - turned out to be a little more mellow, and with a more consistent flavor.

That being said, I think this could easily be either a last-minute appetizer or a make-ahead. And - touchdown - it also opened up a certain amount of space in our cheese drawer!


Oh - and a post-script note to anyone else out there who wears a wedding ring (or any ring, obviously) and also cooks:

The cheese mixtures tend to get into every nook and cranny. And while that may be a tasty little snack for later, it doesn't look all that good.


-----
Are there any semi-retro foods that you like that you think I should try out? I'm not sure I'd be willing to work with aspics, but other than that, let me know and I'll see what I can do!