As I mentioned last week, some blog posts take longer than others to complete. This one was actually started about two or three weeks ago, depending on how you count the days. There were two different batches of chili involved from start to finish. And at least 4 recipes, when you really come right down to it.
You don't have to look to closely at this, because you'll see the same photo again at the end...
So, without further ado, here's the intro video, from October 14th:
The recipe that we were working off of for the first batch of chili - the one that went to work with Christopher - looked something like this:
Definitely more than the 4 ingredients of my mom's chili, but - believe it or not - still fewer than the other recipe we'd found.
Basically, we started with the solid ingredients that you'd expect:
The thing in the lower right is a poblano pepper that I roasted over one of the burners of our gas stove, and then peeled.
And a bunch of spices and stuff:
This was actually the set-up for batch two. The ingredient list from batch one was being used for reference and modification.
We followed the random recipe from the Internet as our starting point, going by what we figured just made sense. Remember: These two batches were the first times Christopher had made chili, and it was a much more complex version than I'd ever made, so there was a certain amount of guesswork involved.
We started with a bunch of chopping. Onion, poblano, jalapeño, and ancho. (Did you know that ancho chiles are simply dried poblanos?)
The first time through this recipe, we used two large onions, but the result was a little sweeter than we'd have liked, so we went with just one onion this time.
The next step in cutting was the chuck roast - about 1.25 pounds' worth - that went into about 1.5-inch cubes.
See the new recipe being written as we went along?
As a nod to both my mom's recipe and the recipe we were working off of, we had ground beef - and bacon - to add, as well.
I think this photo looks upside down.
First into the pot (with a little oil) were all of the vegetables.
Honestly, at this point, you could have about given up and walked away. The house already smelled amazing.
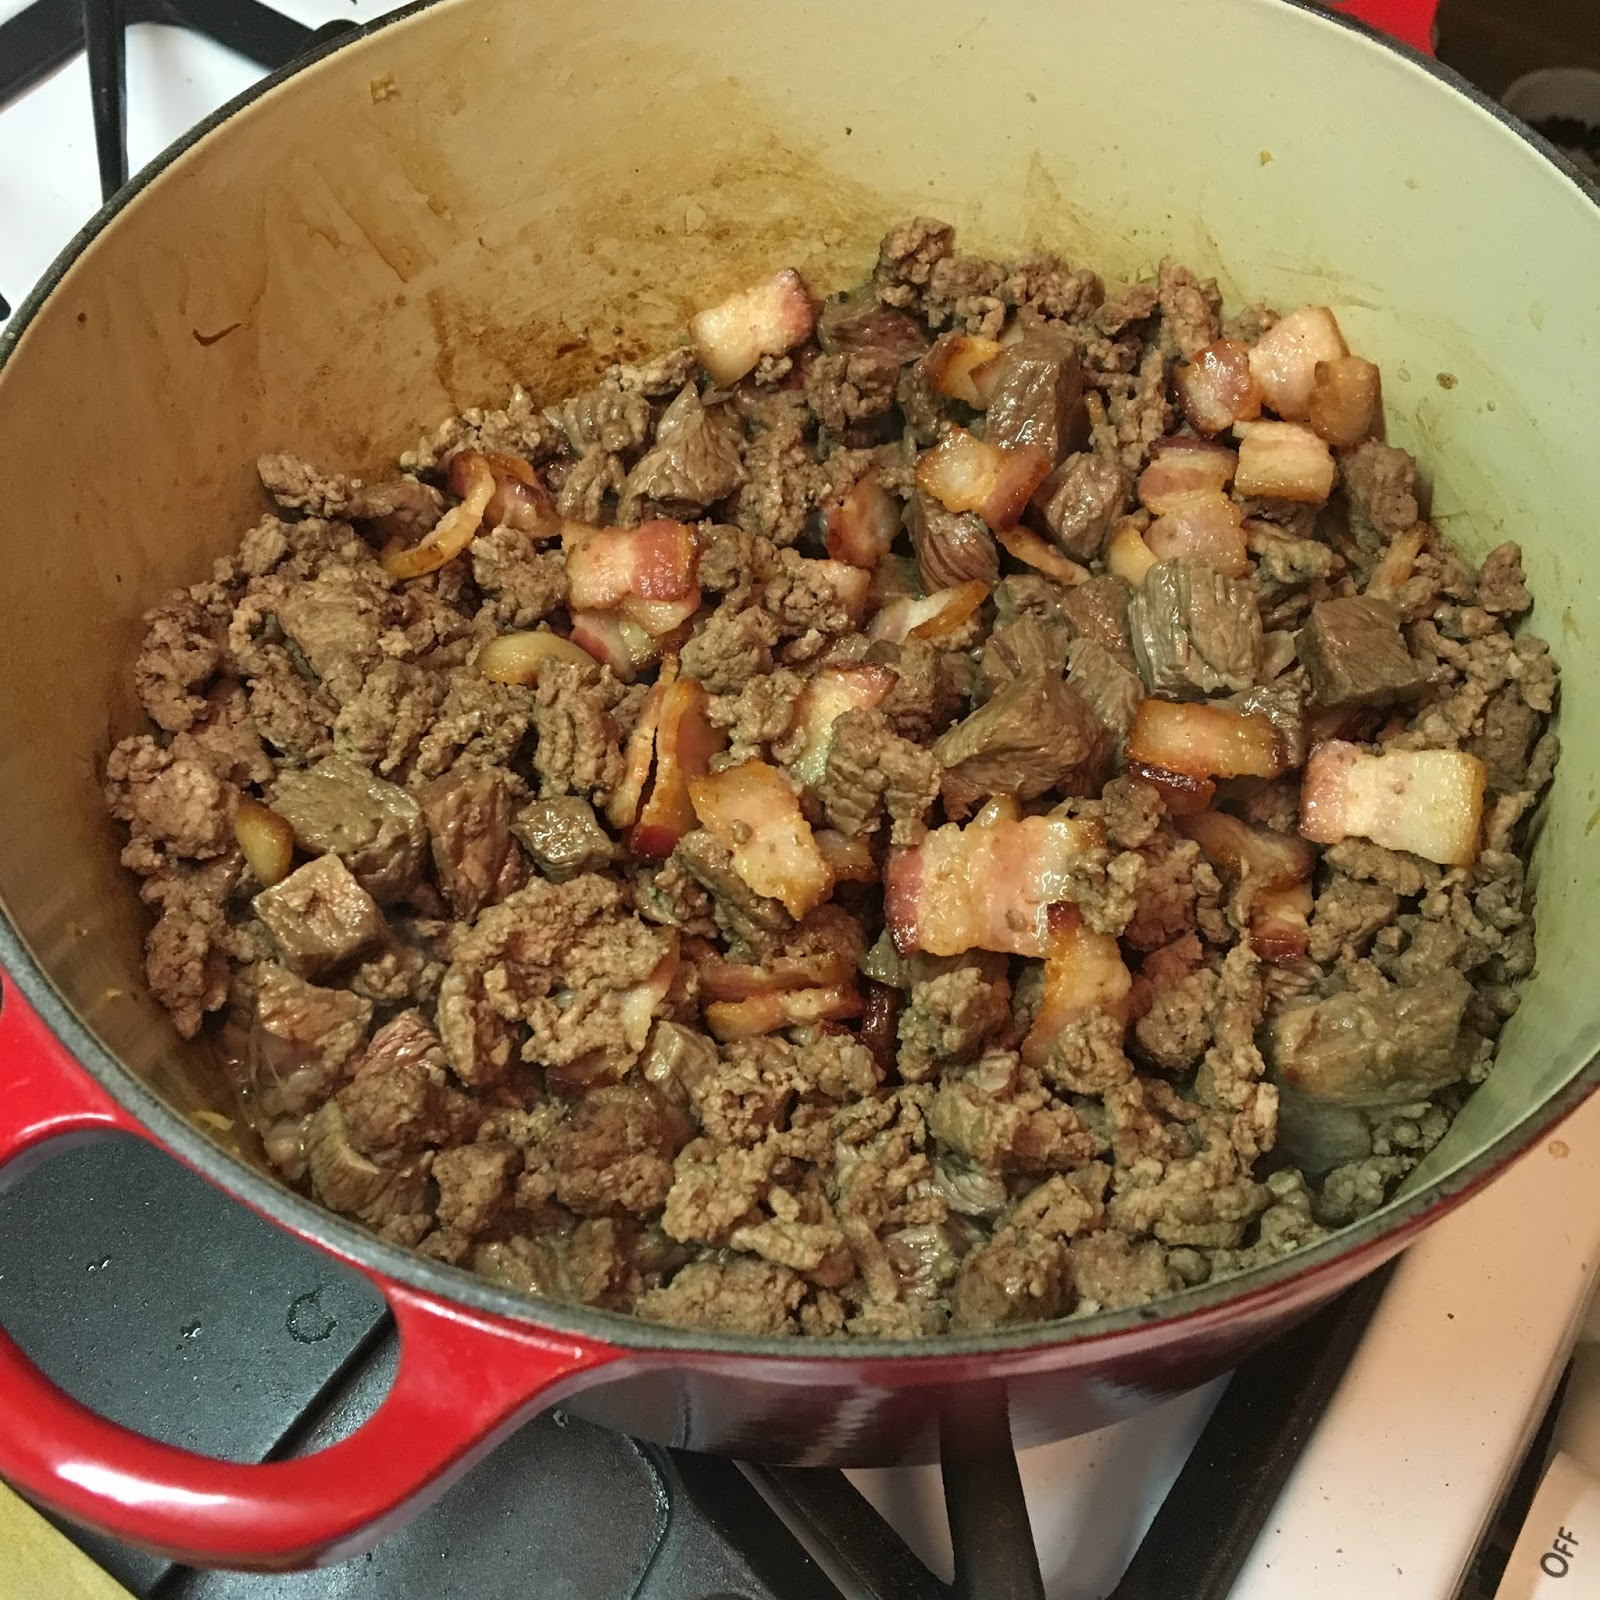
Meanwhile we fried up the ground beef and bacon in a separate pan (in part to keep from getting all the extra fat in the chili).
Who else just wants to dive into that with a fork?
A quart of beef stock goes in with the veg, and it all simmers so that the flavor really blends.
For once - an action shot that I didn't have to juggle the camera for !
In this, the second batch, we strained out most of the vegetables from the stock once they'd cooked down.
This is kind of a personal choice moment. I really like more stuff in my chili. So I would have left it all in - and I may not have been overly careful in straining...
Once the broth was out of the pan, we browned the cubed roast on all sides, then added the ground beef and bacon in.
I suspect that this is the photo where we completely lose the interest of any vegetarian or vegan who might have made it this far.
Next stop: two 28oz cans of tomatoes. These could be whole (though you'd want to break them up a bit while stirring) or diced. We chose diced.
That's not my hand!
I have to admit that it looked a little sad with the tomatoes, at first.
But then the beef stock went back in along with some garlic...
...followed by a bunch of spices... (This is the point in the recipe where my mom would say it's time to "tart it up" - spices and spice levels are up to the person putting them in.)
Based on our notes, I believe this photo has 6 tbsp of Chili powder, 1/2 tsp each of Coriander, Cumin, and Cloves, and 1 tbsp of Cinnamon.
...and pepper...
Let's just say "a whole bunch" of both black and white pepper.
...and even a bay leaf.
That's 1 Bay leaf, on top of 2 tbsp of Paprika, 1 tbsp of Cayenne, 1 tsp of Thyme, and 2 tbsp of Brown Sugar.
Honestly, at this point, once it warms through you'd be done.
But if you'd prefer it to be thicker and less soup-y, you can leave it on the stove to simmer and eventually the liquid level will slowly go down.
And, slightly more eventually, you can ladle yourself a bowl of chili and put a dollop of sour cream on top.
I feel kind of bad that I didn't get any better final pictures of this. It was a much prettier bowl of chili than the photo belies.
So, how was it? Well, the first batch - the one that was "a little sweet" was fine, but definitely needed some tweaking. The second batch - the one in the photos, above - was certainly not overly sweet...
As I mention in the second video, I know that this isn't exactly a "recipe" post - it's more of an idea post. But if you start with the basics - meat, tomatoes, and spices - you're on your way to making your house smell amazing - as well as making yourself a really satisfying dinner.
Happy fall!
----- So, is chili a cozy food for you? If not, what is? Minnesota winters get pretty long, so I'd love to know what's on your list!
Not everything I make is cookies. Honestly, not everything I make is a sweet, either, but what follows won't really help to prove that point.
This week, when I meant to be writing a completely different blog post, I instead found myself baking for a post-memorial reception. Having no idea how many people would be bringing food - or how many people would be in attendance - I channelled a whole lot of emotions and baked a lot.
How much is a lot?
Well, I started with two Bundt cakes (though I decided I actually wanted three, so I made another the next night).
I'd swear I've blogged about these Apple Spice Bundt cakes before, right?
From there, I moved on to about 11 dozen chocolate cookies.
Have we talked about these before? Let me know if you want details.
And - because not everyone wants fall foods just yet, I topped it off with two pans of lemon bars.
I'm sure we've talked about these.
Of course, then I had to get them to the church.
Luckily, I had just the way to do that, thanks to my recent savvy car buying. Let me explain (and wrap this all up):
So, there you have it. The perfect excuse to buy a new car. (Not to mention that my last car was 18 years old, the dashboard lights only worked about 1/4 - which is better than when they were completely out, and the roof leaked when it rained.)
I promise that next week there will be food - and it's not even a baked good!
-----
We're getting into the fall baking/cooking season. What says fall to you in the kitchen? Is it apples and spice? Is it chili? Is it some kind of football fare? Let me know!
Before I begin, I feel I should give a follow up to the Potato Chip Bars from last time: A little time did them a world of good. It seems that, after they were baked, the chips softened a bit more. So, when I took them to Book Club the following Monday (about 2.5 days after making them), they were actually well received. (And this is a group who can be trusted for their honesty.) I still don't plan to add them to my standard repertoire, but I'll give tasty credit where it's due.
But, anyway... This week I decided to address something you've asked about.
Well, not all of you asked, but some of you did. So we're going to look into how I ship all of the cookies that I ship without people simply getting bags of crumbs in the mail.
Since the topic is a bit different than usual, this week we're going to do something a little different with this post, too. I'm going to give you a video that kind of goes start-to-finish, and then I'll follow that with some step-by-step photos. Sound good?
Two things about this video: it was filmed in the fairly early morning, and I'm wearing what I had just worn outside to walk the dog.
For this demo, we're using chocolate chip cookies - the ones from the 1950 Betty Crocker Cookbook that I've featured on here in the past. (You can find a link here - or here, actually, too.)
An approximately 8.5-inch basic paper plate is our starting point for this package. I think most brands (whether name brand or house brand at a grocery store) have something about this size - which fits into a regular flat-rate envelope from the Post Office really well.
For a non-frosted cookie of a relatively consistent size, I find that stacking them around the plate in a circle works really well.
I typically get about two dozen cookies on a plate this way, in case you're counting.
They aren't straight up and down, perpendicular to the plate, because that would make them too tall when you try to put them into the envelope.
Oh - for the record - if you use one of the smaller plates - which can also hold almost two dozen cookies, they tend to get too "tall" for a flat rate envelope. Why? Because you have to stand the cookies up straighter to get as many to fit.
Okay. Now that the cookies on our larger plate are ready, it's time to start wrapping.
First, we have a double layer of plastic wrap. This helps keep them soft, as well as doing the bulk of the work to keep them in place during shipping.
Next up: the primary way to keep them from getting broken - I typically use bubble wrap. (Though I have used newspaper or other heavyweight tissue paper with decent results.)
I like to use enough bubble wrap to get a double layer of protection on the top. I don't know that it really makes that much difference, but it makes me feel better.
At this point, you can add a card - possibly a postcard - slide the whole bundle into a Ziploc bag, and then into the shipping envelope.
For the record, I actually suck the excess air out of the bag before sealing it. This makes it more compact and easier to get into the envelope.
If the plate is just a little too wide for the envelope, you can roll the edge just a bit (this is one of the perks of using lightweight paper plates).
Once you seal it, the envelope is really no thicker than most packs.
Did you know that USPS Flat Rate envelopes are priced with an "if it fits, it ships" methodology? There are some weight restrictions depending on where you're shipping, but within the US, it's currently literally flat rate.
And there you have it: One mailing envelope full of happiness!
Even better - at least for us - this is an envelope of two-fold happiness. I tend to bake for stress relief, but don't want to have all of the cookies in the house. So we're happy to see the cookies leave - and (I assume) people are happy to have them arrive, as well.
----- Would you like to receive cookies in the mail? If so, watch this space in the next couple of weeks. As soon as I can get the logistics figured out, maybe we can make that wish come true for a reader or two...