Sunday, January 20, 2019

Pound Cake (actually by the pound)

If you've been baking for any length of time, you know that most pound cakes aren't actually made using pound measurements (at least not in the States). But I was reading "Consider the Fork" by Bee Wilson (a book I would highly recommend if you're interested in the evolution of how people have cooked/kitchened over time), and it got me thinking that I should try it.


Plus, I got a new Bundt pan at Christmastime, so... it was really kind of fate.

Some day I will look up how to set the still images on YouTube videos. Today is not that day.

Here's a better look at the pan:

One of my favorite things about Bundt pans (which, now that I'm typing it out feels a bit ironic based on this post), is that they tend to put the volume of the pan right on the outside of the pan. This "Skyline" Bundt pan is a 12-cup pan:
But how many pounds is that? 
The basic recipe I went with was from Alton Brown, and I found it on the Food Network website:
I trimmed off steps 1 and 2, because they didn't really have anything to do with the full process. 


As usual, I started out by getting my ingredients together.
Yep. That's really all the ingredients. 
First step: Creaming the butter and sugar. As a reminder, we're doing this all by pound, so we started with:

I went ahead and creamed that all by itself, first. Because it always seems to blend with the sugar better if it's got a head start. 

Next, since I wasn't using a pre-portioned pound of sugar, I turned on my scale.
As you can see, it's currently at Zero pounds.
Of course, you can't just pour sugar on a scale, so first I had to add on a bowl (I chose one with a handle and pour spot)...
Who knew that my bowl weighed almost 3 pounds?
...and then zero out the scale.
Yay! Back at Zero!
In went the sugar.
I feel like I should have checked the cups, just because... but I didn't.

Adding the sugar to the butter was actually a bit of a zen moment for me. Both the sound and the shimmer were kind of cool.

Now, the recipe calls for creaming the butter and sugar for 5 minutes, which I'll admit seemed like a bit of overkill. But when I was looking at other recipes I actually saw comments about how they had skimped on the creaming time (which also helps the batter get more air in it), and had regretted it. And, by the time that the timer went off, I could see why.

It was light and fluffy and seemed kind of miraculous.
Also - having just read "Consider the Fork" - this got me thinking about how long it would have taken to beat these by hand to get to this consistency. Or how long it would have taken someone's kitchen help back in the day. Ugh.
One interesting thing that happened in all of this. If you've ever worked with Kitchen Aid mixers, you know that they're heavy. Well, during the five minutes of mixing, this one pivoted about 45 degrees on my prep table.
Usually, it's at an angle across the grain of the table. But after 5 minutes, it was in line with  it.
So I straightened out the mixer (or un-straightened it, I guess), and moved on to the eggs. Lots of weird feelings about measuring the eggs by weight. But I realize that we also never really measure them by volume, either. Instead, with eggs, it's kind of "Hey. This is an egg-sized thing. Let's assume it's the same as those other ones." Which, when you think about it is a little odd. Right?

Anyway. I needed a pound of eggs. Alton's recipe called for "9 large eggs" but I wanted to make sure I was on by weight, so I cleaned out my bowl and started again.

The first egg came in at 1.75 ounces. Which - based on math - meant that 9 should be about a pound. Assuming of course, that they were all the same.

Eight eggs later, we were at 15.75 ounces. Which I figured was as close as we were going to get.

The recipe calls for adding in the eggs one at a time while the mixer is running. But, of course, I had them all in a bowl/pitcher at this point. Thankfully, eggs kind of stick together, even when they're out of the shell.

So, as you start to tip the pitcher, the egg whites start to move, and they take the yolks with them.
Can you see the white going into the bowl, pulling the yolk behind it? 
Honestly, it's kind of cool to watch. I'd recommend egg pouring as something to try the next time you want to impress a small child in the kitchen. (Just don't mention where they came from - or what they're made of.)

I feel I should mention that there different opinions on how to add the eggs to the pound cake batter. I, obviously, went for whole eggs going in all at once. But some recipes say you should only add the yolks in at this point, then whip up the whites and fold them in at the end.

One of the reasons for this is that the batter can look "broken" otherwise. What does that mean? Well... it means it could look like this:

And, if you happen to get a phonecall at this stage and walk away from the mixer for a few minutes, it could even end up looking like this:

Even so, I'd rather deal with a batter that looks a little odd than have to whip egg whites and fold them in later. So... There you go.

I added the vanilla and salt (not a pound of each), and then went back to the scale.

Today, at least, one pound of flour...

...was right about four cups. Flour - because of the way it can settle - is actually one of the worst culprits for holding different volumes at different times. (And that doesn't even factor in sifting...)
There's something very wintry about this photo. 
I was good and added the flour in three installments, as the recipe recommended.

And by the time it was done, the batter was thick and, well, luscious. It held its shape when I took the paddle out of the bowl, even.
I will neither confirm nor deny whether I tried any of it at this point. Because - obviously - raw flour and raw eggs are both really dangerous. But, if I had tried it, I'm sure it would have been kind of airy and softly vanilla-ed. 
Next up, getting it into the pan.

Oh. Crap. I forgot to mention that I sprayed the pan with Pam Baking spray. It has flour in it, and works really well for me in most baking. (I also really like the Bak-Kleen baking spray for the same reason - but one Pam is available in the grocery store, and Bak-Kleen is typically only in cooking stores.)
NOTE: Because this has flour in it, it is NOT good for people who can't do gluten. When I bake for my gluten-free friends, I go for the old-fashioned butter and (gluten-free) flour in the pan.
Looking at it as I put it into the 340-degree oven (I compromised between the 325 and 350 recommendations), I realized I should have smoothed the top a bit better.

According to Alton, I needed to aim for an internal temperature of 210 degrees, and since the woman at NordicWare had cautioned me about how a deeper Bundt pan can bake, I didn't take any chances and inserted my thermometer as we got close to an hour.

As we passed the hour mark, we were getting really close.

When the thermometer beeped, I pulled the pan out of the oven and set it on a cooling rack to set up for about 10 minutes. Possibly the most difficult part of the entire process.
Also, this is when I noticed that the portion of the cake closer to the back of the oven had risen a little better than the rest.
Ten minutes gone, I placed another rack on top and started praying. In part, I was hoping it would come out. 

I was also hoping my hands would be big enough to grab the sides of the two racks and flip them over without the pan sliding out.

Success!

I know I usually don't have random video in the middle of my posts, but this was too exciting a moment to only use photos:

And, yes, it came out of the pan so well that pretty much nothing was left behind:

Once it had some time to cool, I moved it to a plate for photos. I may have moved it too soon - you'll find out why I think that in the video below.


At this point, you could drizzle it with glaze, but I opted for some basic powdered sugar - just enough to really show off the design.


So... how'd it do?

I'd have to say that, pound-for-pound, it turned out pretty well.


Although... It does kind of look like it needs... something. (If you watched the wrap-up video, you already have a spoiler as to what's coming next week.)

By the way: Before I cut into it, I put it back on the scale. Remember that I measured everything by pounds - a pound each of four ingredients (butter, sugar, eggs, flour), plus a little bit of vanilla and salt. So that should give us a four-pound cake, right?

Well, no. Because the cake rises as the moisture in it expands. This forces it all to grow. But then the moisture also evaporates. And, in this case, took about 7 ounces of the cake with it.

Isn't kitchen science fun?

-----
What's a recipe that you've always wanted to learn more about? Is there something you've always heard of but never tried? Let me know and I'll see if I can work it into a future post!

Sunday, January 13, 2019

A Flat Flop - Pizza Crust Product Testing

There are things that seem like really good ideas but just don't turn out quite how you'd hope.

Sometimes that's a blog post that you prep on Wednesday still not making it online until Sunday. Sometimes it's the thing that's the subject of the blog post simply not turning out as you'd like.

This is (mainly) about the latter.

So, yeah. I was walking through the grocery store the other day, buying the crescent roll dough for last week's post, when I saw a new pizza crust available in the refrigerated case. We've tried a few of them in the past - trying to make at least slightly healthier versions of the preservative-filled frozen versions - and we're frequently on the lookout for new crusts.

The Wewalka crust looked promising.

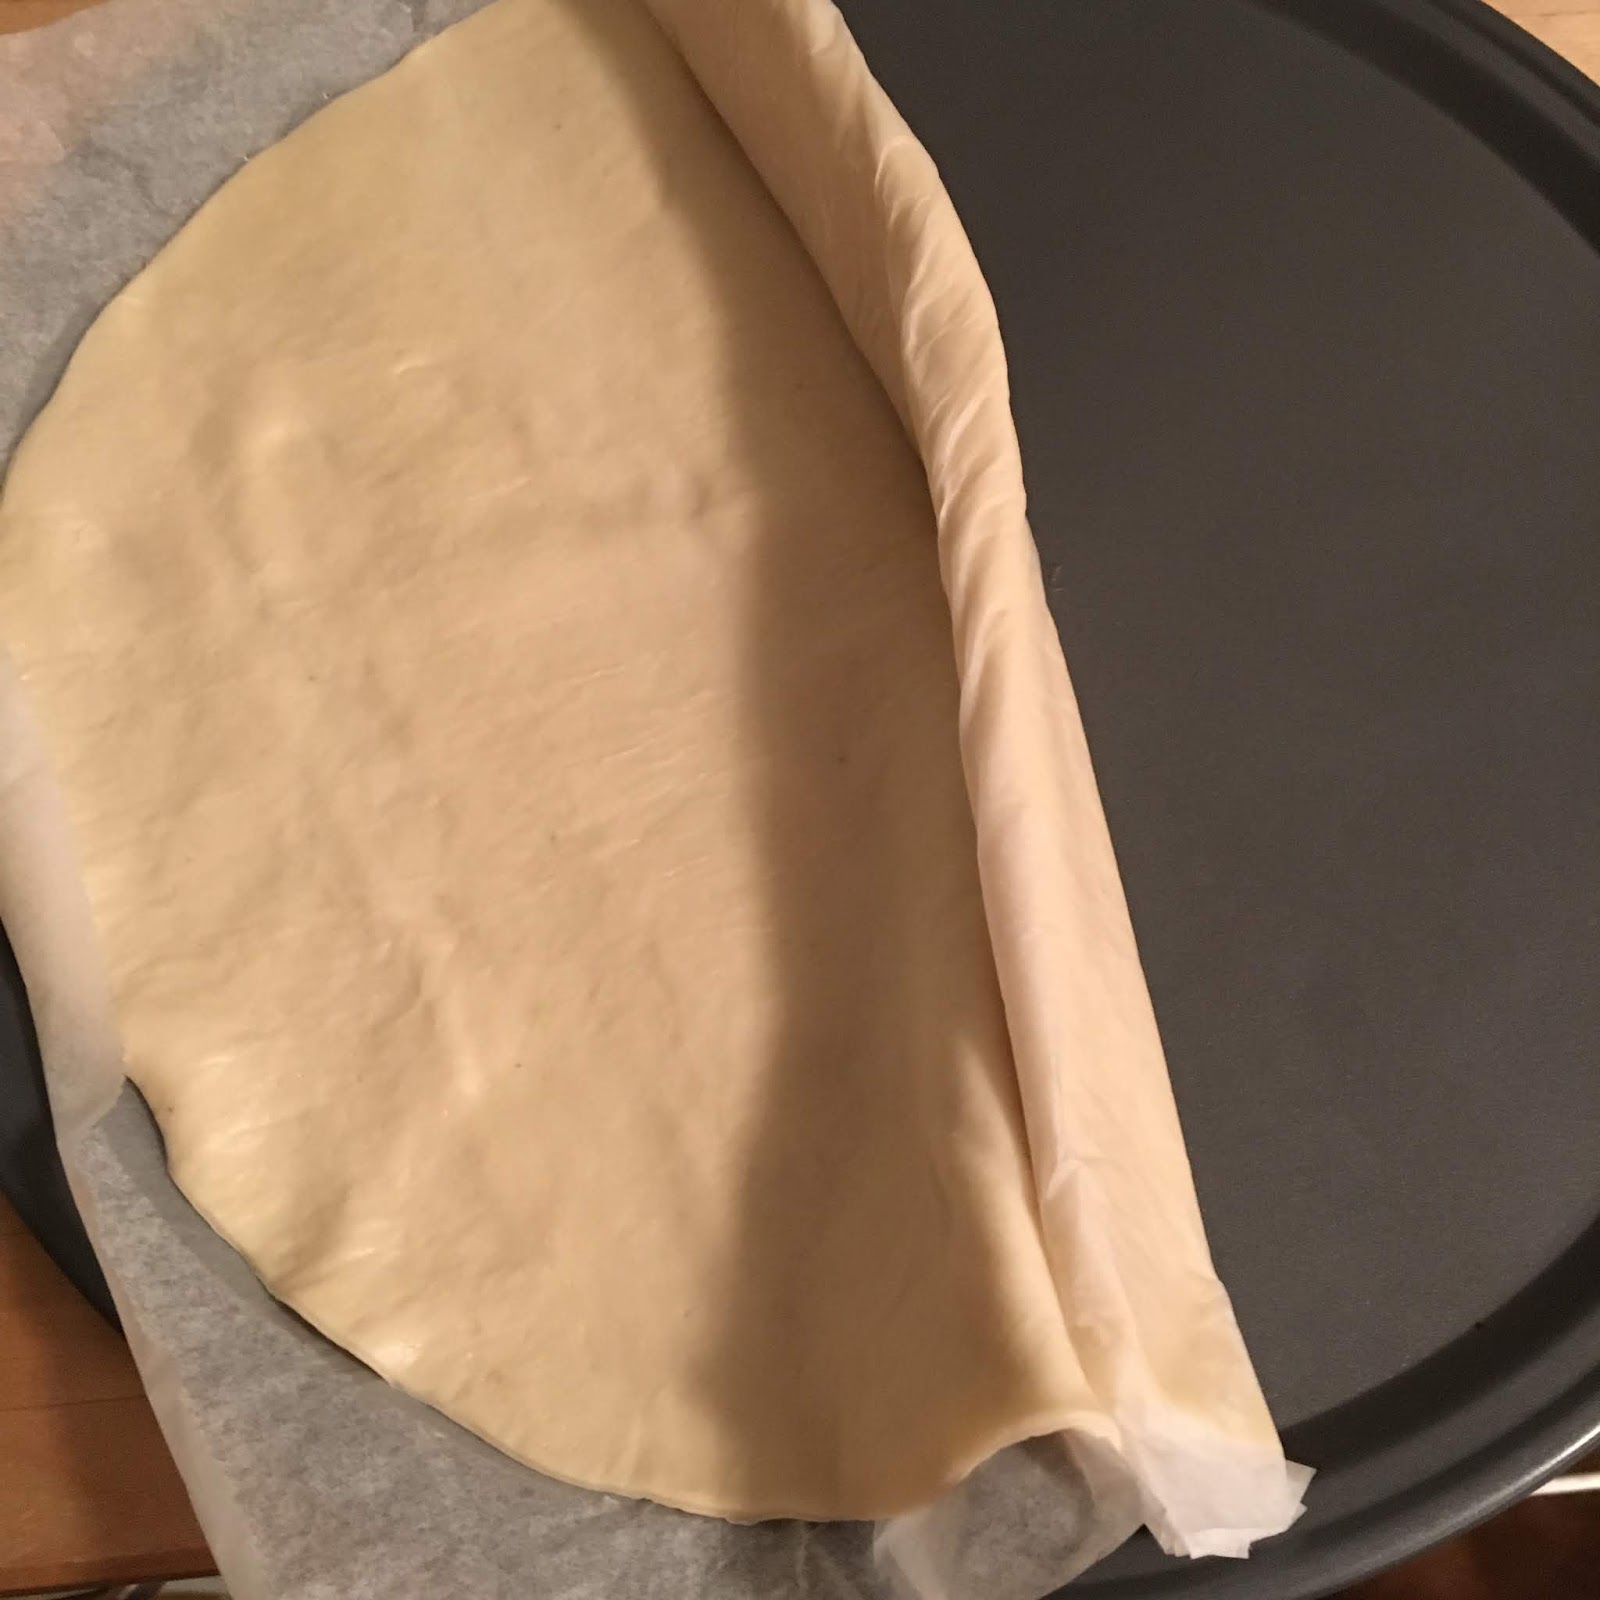
A nice size (about 11.5" round), and rolled in the same way that you get rolled pie crusts, so there's no mess of rolling it out, etc. 
Even Fiona was interested in how it would turn out.
It's rolled in parchment paper, so it's incredibly easy to work with. I was impressed - and very hopeful. 

And it fit perfectly into our 12.5" pizza pan (which fits perfectly into our toaster oven).

Again, I was happy to see the parchment - it means that you don't have to worry about it sticking to the pan. 

So, crust taken care of, it was time to work on the toppings. 

I started with an 8-ounce can of tomato sauce, which I doctored up with oregano, garlic, pepper flakes, black pepper, salt, and just the slightest bit of sugar. 

I opted to spread it all the way to the outer edge of the crust (no point in ending up with the annoying dry/hard edge that you get with most store-bought pizzas).

I put down a base layer of some of the 6-cheese Italian blend that I had left over from the pepperoni crescent pinwheels.

A layer of pepperoni...

...and some good-quality blue cheese.
We really like this brand. It's made in Minnesota and has a creamy, tangy flavor that pairs well with spice.

And, yeah, I topped it with a bit more cheese, just because.

And into the toaster oven we go!

My hopes were so high at this point. This pizza had everything going for it: tailor-made sauce, just the right toppings...

And, with a little time, it came out looking amazing.

Great thing about using parchment paper is that you don't have to worry about this sticking to the pan. And, as long as you stay below 450 degrees, the paper won't combust.

On inspection, it looked like everything had gone right. The pizza was cooked to the edge, and the toppings had all blended together.
But, no, it didn't look blurry in real life. 
I did not hesitate to move it to a cutting board and dive in.

It looked great. And so we served up to dig in.

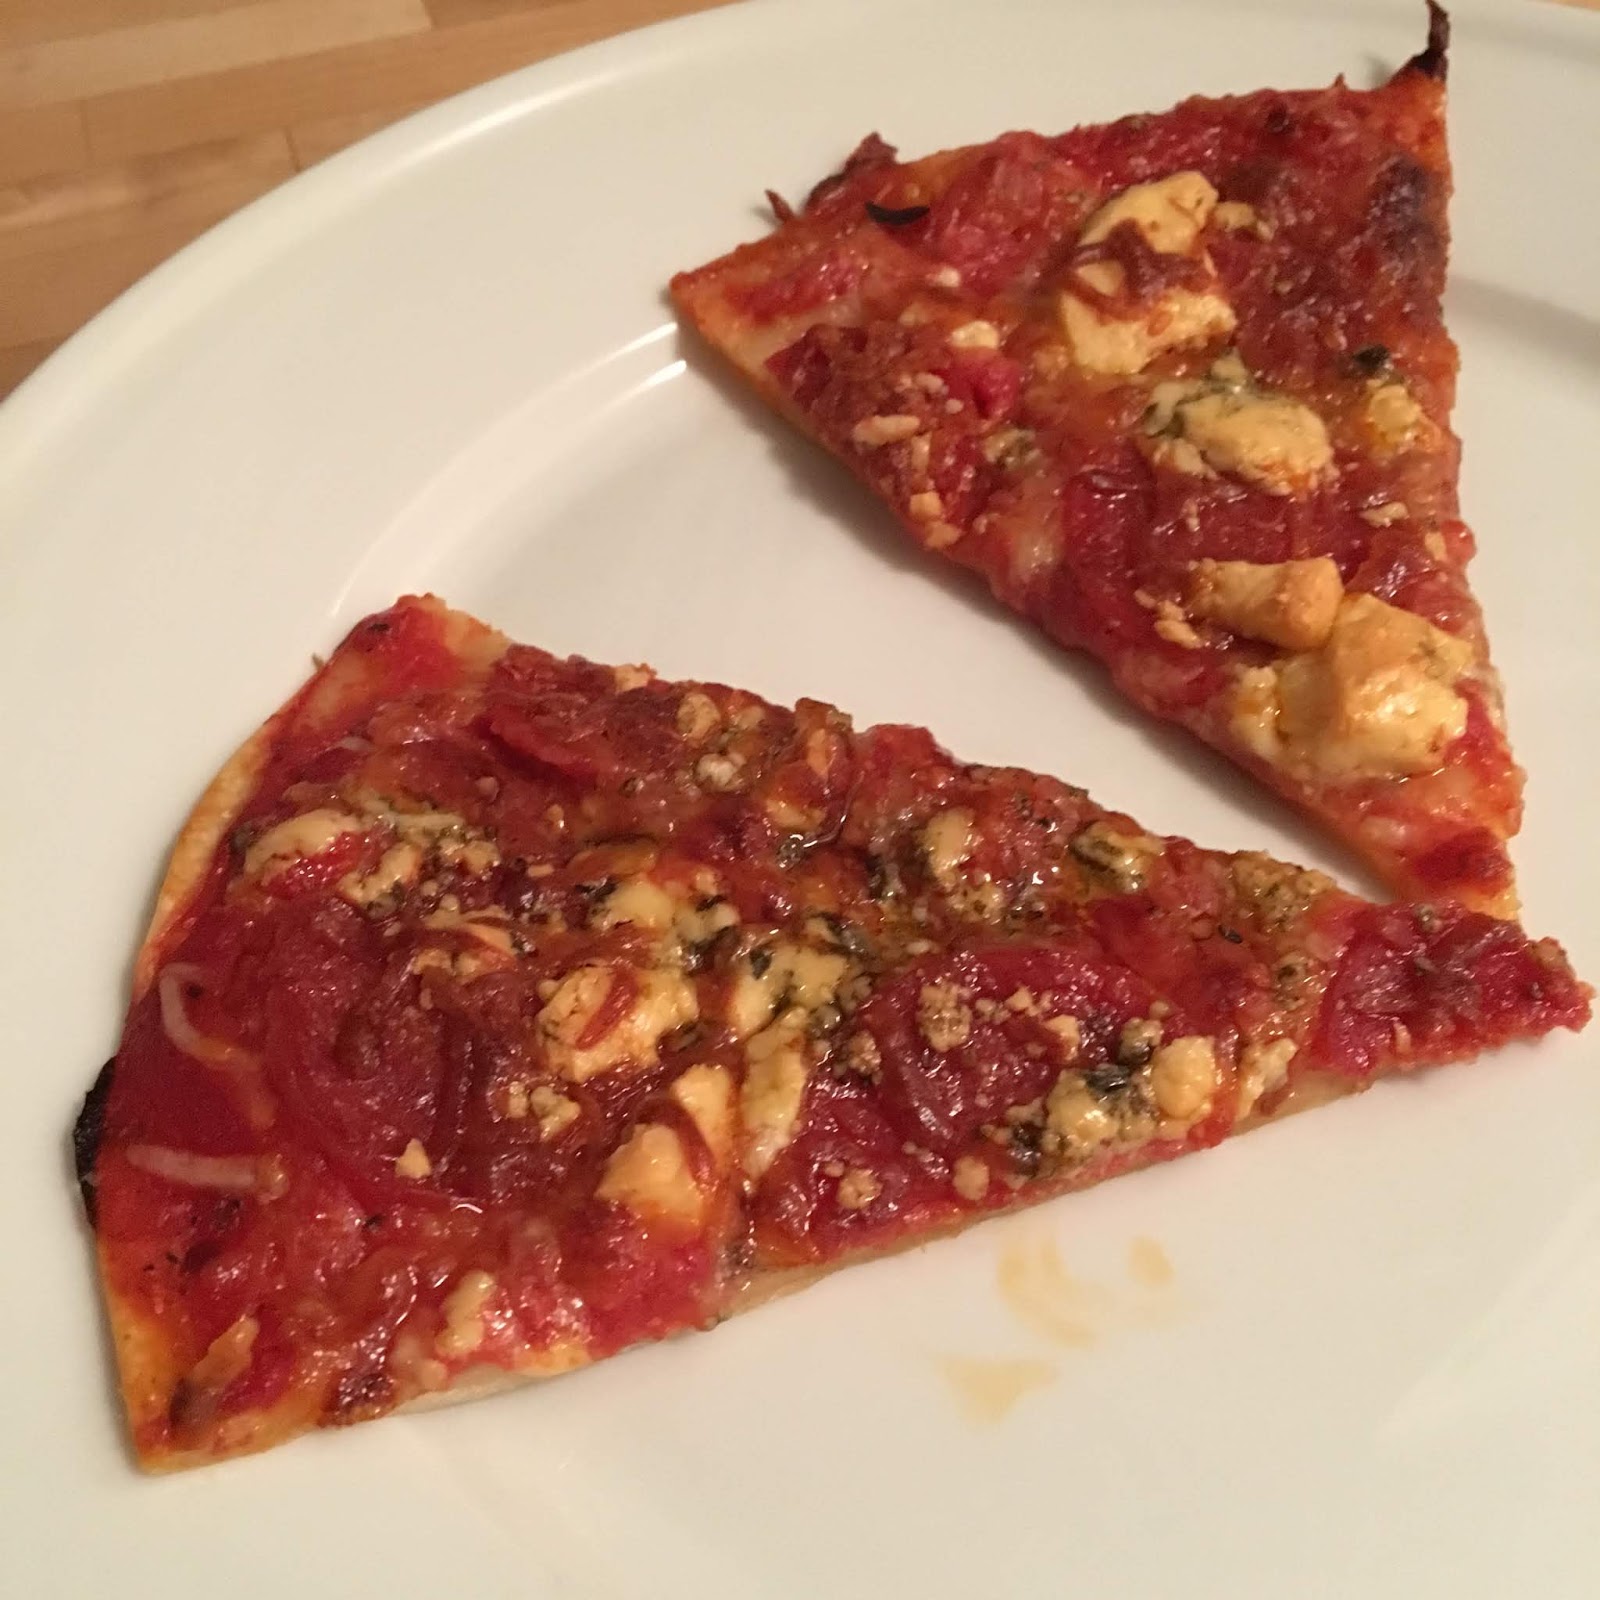
Somewhere around the second bite, though, I started to realize that the crust was... chewy. Not thick-crust chewy, but chewy none-the-less.
I don't know if you can see in the photo, but the crust seemed to kind of have two layers that weren't quite right.
Would it have been better if we'd baked it on a baking stone or a pizza pan with a perforated bottom? Maybe, but that would kind of defeat the purpose of baking it on the parchment paper.

The flavor wasn't too bad - and the crust didn't stop us from eating our dinner - but long before we were done we had already decided that we wouldn't be trying it again. 


Guess it's back to the drawing board - or at least a pizza delivery or two - for now.

-----
Are there any products you've seen on the grocery store shelves that you weren't sure you wanted to try - but you wish someone else would? Let me know, and if I can find it - and if it's not too nasty looking - I'll see what I can do!

Sunday, January 6, 2019

Crescent Pinwheeling into 2019

Did you all make it through the Holidays and the change of year? I'm happy to say that we all did, here. And now that it's 2019, it's time to get back to actual food on the blog!

Today, we're aiming for these Crescent Roll Pinwheels:

There is something really home-y about these that makes me kind of happy to think of them. I don't really make them often (it's been years, honestly), but I had the chance to make them this week and it was pretty fun - and with good results. Here's how we got there:
Note: The shirt is from a company called Litographs. They do shirts/posters/soft goods with the text of books printed on them in artful designs. The one I'm wearing in this is Around the World in 80 Days. I thought I'd mention that because I always have people asking me about the shirts that I have when I wear them. 

As I mentioned in the video, there's not really a recipe to go along with this post. I went to Pillsbury.com and searched "Crescent Pinwheels" for the basics, and then went from there. Basics that I learned: 
  • You're supposed to press the triangles together (or use the "crescent sheets") - though that didn't make a huge difference for me.
  • About 1 cup of mixed fillings should be enough filling for the full tube of dough (but you'll have to estimate).
  • These bake at 350 for about 12-15 minutes. 

As I also mentioned in the video, I opted to try out two different tubes of crescent dough: Pillsbury and "Essential Everyday" (a less-expensive house brand at Cub grocery stores). 

Now, I admit that the difference of somewhere between fifty cents and a dollar per tube (or per 24 pinwheels) seems like an odd thing to worry about. But I also know that there are times when a buck can make a huge difference in your grocery budget. And I figure that if they're going to be on the same shelves in the store - and the house brand obviously compares themselves to Pillsbury - I wanted to know how they would do. 

As I'm sure many of you know, one of the best things about using dough-in-a-cardboard-tube is that you get to whack it on the counter to pop it open. (Okay. Yes. The tubes now specifically say that you're supposed to peel the outer wrap and then press a spoon against the seam until it pops. But... really... what's the fun in that?)

First up: The contender...
No. You're not missing anything. Nothing happened when I whacked it on the edge of the prep table. 
After the underwhelming thud of trying the favorite way of opening the tube, I went for their "spoon at seam" technique. 

However, I wasn't really sure which end of the spoon to use. And - why a spoon and not the tip of a knife? I ended up using the back end of the spoon.
Yes, it worked. No, it wasn't very fun. 
I moved on to the Pillsbury. It did not disappoint. 
That was after one quick whack. No spoon needed. 
I feel like we need to take a moment and compare the two photos, above. Can you see how much bigger the "poof" of the Pillsbury tube is? That dough really wanted room to expand. (Consider this your daily dose of foreshadowing.)

Excitement complete, it was on to the assembly of my pinwheels. 

I unrolled each "rectangle" and then tried to mush them together to get rid of the perforations. You might notice the difference in sizes. The smaller rectangles came from the "inner" portion of the roll. I'm sure that if I wanted to use a rolling pin, I could have gotten them all to the same size. 
This is pre-perforation purge, obviously.
 I chopped up some pepperoni. (I'm guessing that's about half a cup, right?)

I also chopped up the pitted Kalamata olives. (Oddly enough, they seemed to become a smaller amount as I chopped - while the pepperoni seemed to expand.)

First layer: olives on one side, pepperoni on the other.

Second layer: oregano for all!
The olive side really could have used a bit more oomph. If I do this again, I'll probably either get an herbed feta or just add more spice at this stage.
Feta crumbles on the olive set, "Italian cheese blend" on the pepperoni. (The blend was on sale - I honestly don't know what cheeses were in it.)

Oddly enough, this brings us to the step that had me the most nervous. 

Oh. Sorry. No. The rolling-up part didn't make me nervous. Though - as I looked at the way the two different doughs were looking, it did make me wonder a bit.

The dough in the photo above this is the house brand. You can see that it's a little dry looking. The dough in the photo below is the Pillsbury, which seemed much more resilient and supple.

The actual step that had me a little freaked out was the cutting step. The full "sheets" of dough are about 4"x6", so when you roll them up the roll is only about 4" wide - but you're supposed to cut them into 6 pieces.

I started by cutting them in half.
Well... half-ish.
Then I cut each half into thirds.

I kind of loved that one of the online instructions was very specific to say that the next step is to put them on ungreased cookie sheets "cut side down." 

Now, that kind of makes sense for the end pieces (because they have on cut side and one non-cut side), but all the rest have two cut sides. So... apparently they mean that you need to place them "flat" on the cookie sheet, instead of standing up...? That kind of just seems logical. So I'm not sure why they had to make it sound confusing. 
Apologies. That pan looks like it's upside down and floating in space. 
As I was putting them on the pan, I realized that I really should have worked the filling farther to the outer sides. The end pieces looked pretty barren.
You can see the filling in the "middle" pieces, but the end bits look like they're just dough.
On this first pan, all of the olive ones were made on the house brand dough. If you look at the dough on the left, below, you can see a few kind of dry-looking sections. Hmm...

They come out of the oven when they've become golden brown.

Unfortunately, though the Pillsbury ones turned a really nice golden brown (above), the house brand stayed a little lighter on top (though the bottoms were definitely done.)
In reality, these were not blurry. 
This is probably a better comparison shot of the difference:

And then there was the size differential between the two doughs. To make sure that this wasn't a result of the filling, when I baked my second pan, I swapped the fillings. As you can see below, the house brand batches simply didn't puff as well as the Pillsbury. (The Pillsbury ones are about 2-3 inches across. The house brand ones maxed out at about 2 inches.)
You were wondering where the foreshadowing from the tube pop was going to come in, weren't you? 
So... Okay. The house brand pinwheels are a tiny bit smaller, and not quite as golden. But if I didn't have the Pillsbury to compare to, I probably wouldn't have known that. This brings us to the biggest factor: taste...

In other words, I do think that - in this case - I'd vote for the name brand instead of the house brand (at least this house brand).

Although, when put all in the same dish for serving, they look pretty good, no matter what. And - with a total prep time of less than an hour (a bit longer for me, because I was taking pictures and recording video and getting ready to go out), these are a great, quick, variable, snack/appetizer.

Next time I might try one savory and one sweet. Maybe a little cream cheese and cinnamon or strawberry...

Epilogue: People at the party we took them to really seemed to enjoy them. There were two people there who had (I kid you not) never heard of dough-in-a-tube. And they were very impressed.


-----
What are you hoping to cook up in the new year? Anything you'd like to see me tackle in the kitchen? Let me know!