 |
| Freshly home from the plant sale. |
 |
| About a month in. |
 |
| About three months along. |
Let’s discuss:
I feel like the momentous nature of this occasion requires me to go through all of the steps of a recipe, even though I really just want to go straight to the sandwich. So, here we go…
Ingredients:
Because it takes the longest, I start the egg frying...
 |
| The pan is a decent quality non-stick, but I still hit it with just a quick shot of spray, since I wanted to be able to flip the egg without issue. |
 |
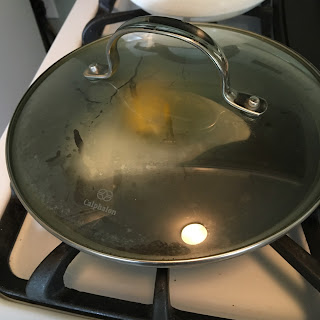
| Covering the pan holds the heat (and the moisture) in so that the egg cooks faster, without having to crank up the heat and worry about burning. |
By the way... I’m a firm believer in using what is traditionally a “meat board” style cutting board for juicy vegetables. After all, I did not want to deal with having to wash dried tomato juice (which somehow always has one or two straggling seeds in it) off of the counter.
 |
| See how the white is set up but the yellow hasn't really cooked, yet? That's what adds a little thrill to the flip. |
Assembly of this sandwich, for me, has a few steps.
First of all, I love doing this on English muffins, because they fit the tomato and egg so well. But since toasted English muffins can be a bit dry I start with a little bit of margarine (which melts in and softens everything).
Then I go for mayo. Yes, I’m one of those people who likes mayo – and although I’ve made it from scratch (which is so much easier than you might think), I am perfectly fine with it coming out of a jar for most applications.
I put the egg on the bottom, with the tomato on top for this one, but I don’t know that it really matters (though it does make for pretty pictures that way).
I think that if I were doing a more complex sandwich (like a club sandwich with a fried egg on it), I’d put the egg on top simply because I could make the rest of the sandwich while the egg was cooking. In this case, though, everything was done at about the same time, so I went for aesthetics.
How did this make me feel? Well, let's find out:
And, yes, this is what the plate looked like about 45 seconds after the camera was turned off. I honestly believe that it was worth every moment of the 5 months that I’ve been tending those plants.
-----
Have a fall recipe that you'd like someone else to try, first? Let me know! Or, if you're looking for a recipe for the Holidays, drop me a line and I'll see if I can find it. This time of year - even more than others - the kitchen is my happy place!


1 comment:
This was really fun! So Happy your tomatoes "produced" and you got to enjoy the wonder of a fresh tomato!
Post a Comment