As we enter the month of Halloween, I'm sure you're already seeing all of the costumes available to help you change your persona for the holiday. In a way, a thesaurus is a costume for your writing.
When you use a thesaurus, you're taking your usual words (your day-to-day persona) and turning them into something else. But - as with any costume - if you're not careful you can end up getting too much trick and not enough treat.
To help explain, let's take a look at a basic sentence:
The guard turned to open the door.
It's straightforward, right? We probably all have the same basic image in our minds of someone in a uniform pivoting in some way to "un-close" a door of some kind.
If we grab a thesaurus, we can move all sorts of different directions, though. For instance:
The sentry twisted to unlock the gate.
Or possibly:
The guardian pivoted to unhinge the portal.
Each of those is evocative of a very different situation. (In my mind, we've gone from a possible prison situation in the original to something possibly medieval, to something that might be science fiction.)
But, if you're not really paying attention to your thesaurus and the parts of speech that the replacement words give you, it can get pretty bad. After all, "guard" can be a verb and "open" can be an adjective. This means that a bad trip to the thesaurus could result in:
The protect changed to overt the ingress.
or
The bulwark revolved to commence the aperture.
Neither of which is as successful as the earlier options. It's kind of like searching for a Halloween costume and instead of buying the Joker you get the Riddler. Or when you're shopping for a vampire costume instead of Dracula you end up looking like Edward Cullen (though, honestly, I'm not sure which is more terrifying).
Your thesaurus can be a great treat - just be careful that you don't get tricked. (And, if you're in doubt, ask an editor. We're here to help!)
So, who made Snickerdoodles last week? My batch went with us to a brunch on Sunday - I like to think of it as a nod to cinnamon rolls without the mess (and without taking up as much space on the brunch buffet, frankly).
I truly do have a very cool recipe I want to share with you that is a take on those Snickerdoodles, but before we get into that I wanted to talk about the most important thing in the recipe: the cinnamon.
It's probably best if I give up trying to type about this and just talk:
As promised above, here's the picture from the local food Co-op (Lakewinds Co-op in Richfield, MN):
Want a day filled with fall bliss? Come visit the co-op with me and we'll stand around sniffing the cinnamon-y goodness. (Do I know how to party, or what?)
And, happily, that also answers my question from the video! The four types of cinnamon (not including the blend) available at Penzey's (www.penzeys.com) are: Indonesian, Ceylon, Chinese, and Vietnamese.
If you have the chance to smell (and taste - and work with) the various varieties, you'll see why I think this is such an important choice to make.
See you next week, with a recipe I can't wait to try - and to share!
----- Have a recipe you want someone else to try before you do? Or something you've tried and you're wondering why it turned out the way it did? Maybe you're on a quest for the perfect Thanksgiving side dish, or a good gluten-free dessert. Let me know and I might address it in a future blog post! (It could even result in a plate of cookies showing up in your mailbox...)
In honor of the day, I've been planning to finally put together the tomato sandwiches that I've been talking about for nearly four months. Let's take a look at how that's going:
NOTE: I know that the end of this video is pretty bad, cinematically, but I thought it was a nice shot of the tree above me still all green and summer-y looking.
So... yeah... Not quite time for the tomatoes, but totally time to start looking at fall flavors. (Typing that just now I started thinking about beef stew and warm bread, but since it's about 90 degrees out, I think I'll wait on those until the weather figures itself out.)
For today's foray into the warm spices, we're going to hop back to 1950, once again, for one of my favorite cinnamon-y cookies: Snickerdoodles!
I kind of love that the recipe starts out with "Fun to say . . . to sniff . . . to eat!" because, well, they are all of those things.
We've made a lot of cookies, lately, so you probably already know the basics of how this all goes together...
NOTE: No brown sugar in these, so we'll be getting cakier, less-bendy cookies.
I think I've mentioned in the past that I always cream the shortening (in this case margarine) and sugar before adding the eggs. Recipes like this one don't actually call for that, but it's a habit I've had for a really long time, and I think most recipes come together better because of it.
I believe it has something to do with the sugar molecules bonding to the fat before the protein is added in. (As usual, if you want me to do some research on that, just let me know.)
I've heard people say that they prefer cooking over baking because baking is too technical and requires you to pay too much attention to details. The chemistry in all of the leavening can be particular, and one small misstep can make a flaky dough turn into concrete. And - believe me - I've had pie crusts do just that.
But, on the other hand, there are some things that can be a little loose when it comes to baking. Take the salt, for instance. Salt in baked goods typically adds that certain something that really accentuates the flavors. (Don't believe me? Try baking something and leaving out the salt - it tastes weird.) But, because the salt is there (mainly) for flavor, I don't typically worry to much about the exact amount, and (unless I've already got a used measuring spoon around) I go by feel.
My closest guess is that this is about half a teaspoon - not including the little bit that goes over your shoulder to ward off bad luck.
I think I mentioned in the first video, above, that this is more of a cookie dough than a cookie batter (which was the case for the chocolate chip cookies). During the final stirring, you can really see the consistency. It's not as stiff as for, say, rolled-out sugar cookies, but it's much stiffer than the cookies we've made this month.
Yes. Doing it all by hand... again.
Since we don't want these cookies to get tough, and we also don't want them to just "melt" on the cookie sheets, the dough heads for the fridge to chill. Typically, this is a "1 to 2 hours, or overnight" situation. You're trying to get the dough to relax, while also bringing it down to a lower temp and making it easier to scoop, later.
If you're ever putting something aside to chill, I recommend covering it (unless the recipe specifically says not to). This will do two things: it will keep the dough from picking up other flavors, and it will keep the dough from drying out.
About an hour later, just before getting the dough out of the fridge, you can get out a small bowl and make your cinnamon/sugar mixture.
If you're thinking this looks like more than the 2T sugar and 2t cinnamon specified in the recipe, you're right. It's probably at least three times that - but it still may not cover all of your cookies.
I'm all for putting these together assembly-line-style. I'm right-handed, so I keep the scoop in my right hand, toss the dough in the cinnamon/sugar with my left, and then transfer it to the pan (also with my left). This keeps one hand clean at all times - which makes it possible to grab the pan and put it into the oven without covering everything in either dough or spice.
When you get to the end, you may need to make more cinnamon/sugar mix. Otherwise, it's possible that your final few cookies will look like the toner cartridge ran out of brown...
The dough is a little sticky, so if it doesn't get rolled in the cinnamon mix, it can look a little spiky.
In the oven, these will puff up a bit (as Ms. Crocker and her team of writers have warned us), and then they will flatten out and "crinkle" on top as they cool.
Unlike the other cookies we've been making, it's a little hard to see whether or not the edges and bottoms are browning on these. You're going to want to rely on your timer until you get a good feel for how the Snickerdoodles behave in your oven.
Because of the sugar on the bottoms of the cookies - and because the pans aren't greased - you're going to want to remove these from the pans pretty quickly after they come out of the oven so that you don't end up leaving carmellized crumbs stuck on the pan.
So, how do they taste?
Happy New Season(ing)!
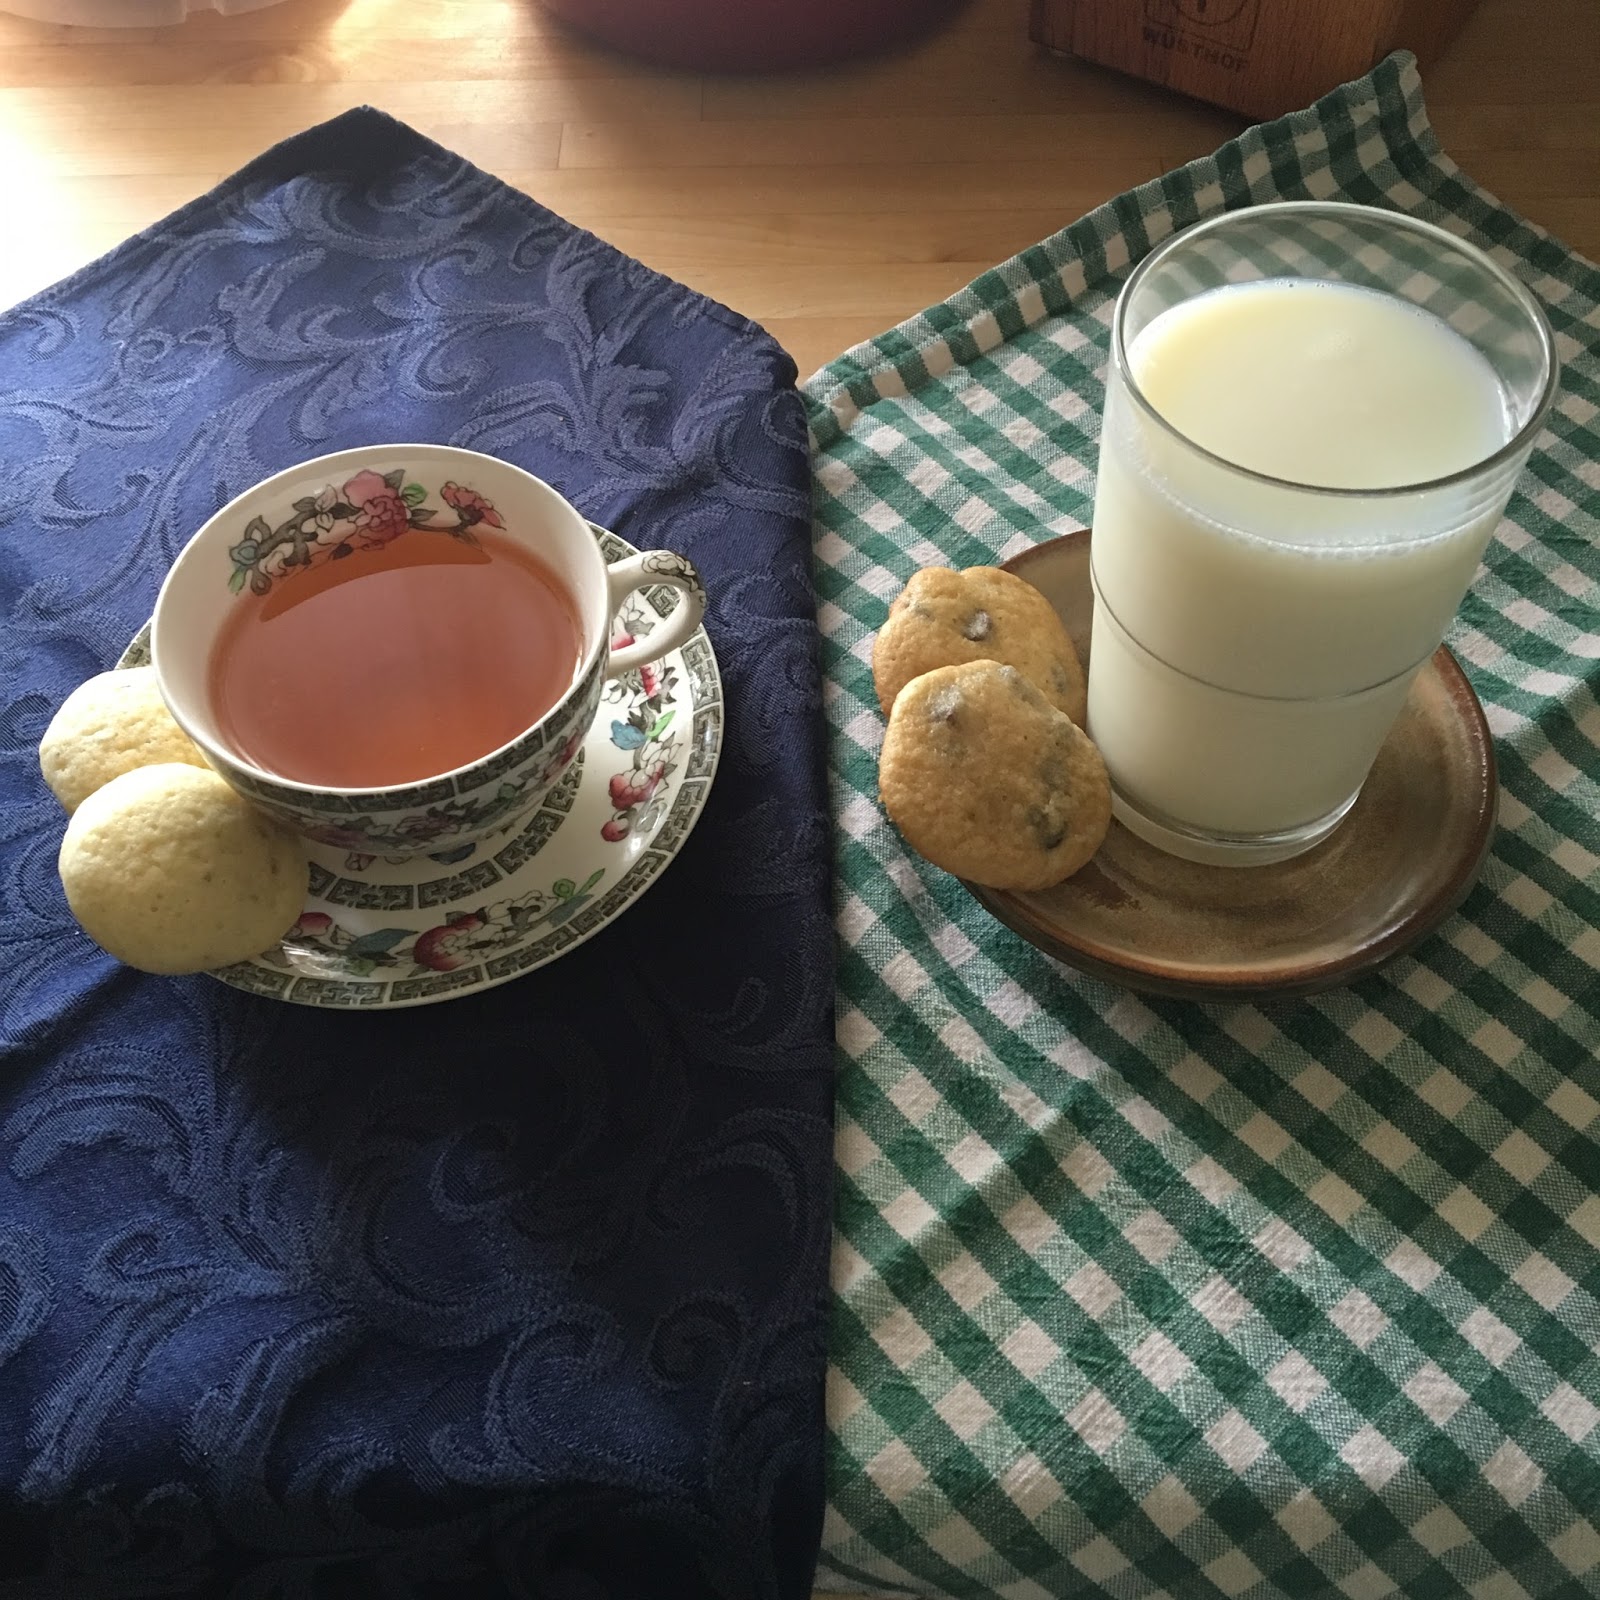
Before you ask, this is a close-up of the cup and plate from the video. The set came from the drug store my parents had when I was growing up. I tried to google the company, but got a whole bunch of information on a castle in southwest England - no hot chocolate in sight.
----- Is there something that you make that always reminds you of fall? Are you a cinnamon or clove or ginger fanatic? Or do you lean more toward hearty stews and chili in the Crock-Pot? Let me know if there's something you'd like to see me work on, and maybe it will show up in a future blog post!
When I talk about the work that I do and mention to people that most of my time is currently taken up working on book-length manuscripts, I often am met with "So do you work on shorter things?"
I understand how this could come up if we were talking about writing, because there are certainly different skills involved in writing a 500-word newspaper op-ed or a 50,000-word science fiction novel. I also know that there are editors who have very specific skill sets and specialize in one genre or another. (And, again, they would be looking for different things in short works versus long ones.)
So the fact that I edit pieces that are 125,000-word manuscripts, and also 125-word postcard mailers, is a little odd. I get that. And I definitely do kind of psych myself up in different ways for each of those tasks.
For proofreading, however, the task is pretty much the same whether the piece is a one-page blog post or a thousand-page magnum opus.
I mean... I'm guessing this is wrong - though there is the possibility that the person having the sale is named Hugh...
Proofreading is all about looking for the minor details that have fallen through the cracks along the way. The period that didn't make it at the end of a sentence. The incorrect homophone when their replaced there. Or maybe the paragraph which has a wonky indentation at the start.
No matter what length the project is, those pieces are going to need to be fixed. The only difference is how long the fixing will take.
So, yes, I'll happily work on pretty much anything - whether the project is really small, or the project is... well... "Hugh."
As we wrap up (for now, at least) this discussion of chocolate chip cookies, I thought we'd revisit something I mentioned earlier: the "healthy" option. Let me explain...
So, alright, they're not really healthy. But they might at least be healthier, and because they have some different elements than the traditional chocolate chip cookies I make, they can be a nice change of pace. Let's look at what goes into them:
The bottom line says "6oz Chocolate Chips" and "1 1/2 cups Corn Flakes"
Not in the photo: 2oz of Hot Water.
The recipe for these starts out pretty much like the last batch of cookies we made. We combine the shortening (margarine) and sugars. (You may notice, if you have eagle eyes, that I'm only doing a half batch of these. I'll explain, later.)
We've got both white and brown sugars in here - a bit more white than brown. If you've been paying attention, you probably have some idea of what that will mean to the final product.
Then we add in our liquid ingredients, which - in this case - includes some hot water (I just go for hot out of the tap).
Christopher bought a whole set of liquid measuring "beakers" from Oxo a while ago and I kind of asked why we needed them. Not gonna lie. I use them more than I ever thought I would.
Now do you understand why I took a picture of the water by itself?
With the extra liquid in this recipe, it does look a little odd when it's all mixed together:
Next go all of the dry ingredients - which include baking powder (instead of baking soda, which was in the other version we've made). And then we get to the good stuff: chocolate chips - and corn flakes.
You can see that, with the addition of the flour, the broken, liquid batter has gotten a better consistency.
Once it's all mixed together, it's still a little "softer" than a lot of cookie doughs. It's really kind of a cross between a dough and a really lumpy (due to the chips and flakes) batter.
At this point, it is so tempting to eat it raw by the spoonful. Remember, though, that this has raw eggs and raw flour in it. Proceed at your own risk.
Once again, the small scoop gets put to use, and we end up with a nifty pan filled with pre-cookies:
I don't know if you can tell, but I did grease the pan.
Into the 375-degree oven, and you'll get to watch them puff up a bit as they bake for about 8 to 10 minutes.
They also get really shiny on top while they're baking, but should look "dry" on the top when they're done. A really good thing to look for is also the light golden edge around the base of the cookies, which tells you they're ready to come out of the oven.
Can you see that they're not glossy, any more? And although the tops are still pale, the bottom edges have just a faint golden brown edge going on.
They do spread a little, but not very much, so you can easily fit 20 on a cookie sheet. (24 might work, but they'd probably run up against each other.)
I let them set up on the pan for just a little bit (basically long enough for me to close the oven and get out the cooling racks that I undoubtedly have forgotten), and then they typically come off the pan pretty easily.
When all is said and done, they should have a nice, golden base:
And a slightly cakey interior texture:
Much like the Sugar Jumbles, these are more likely to "tear" when you try to bend them, instead of actually bending like the other chocolate chip cookies.
It will probably come as no surprise that the texture is kind of a cross between the all-white-sugar Sugar Jumbles from last week, and the "regular" chocolate chip cookies. Their "rise" is somewhere between the two, as well. For comparison (these were both made from the same size scoop):
Yep. The one on the right is from another batch of chocolate chip cookies I made earlier in the day. Have I mentioned that I make a lot of them?
You're probably wondering about the corn flakes in the cookie and how they impact everything. That's a little harder for me to write up, so let's go back to video for that...
For the record, yes, I thought I trimmed the start of this video. No idea why you have to watch me get in position in the finished product. (I'm learning...)
Next week: Something other than chocolate chip cookies!
But wait... there's more:
-----
Want to help me decide what to make in the future? Have a recipe that you're unsure about - or a kitchen question you want me to look into? (After all, we're getting close to that time of year when we all want to impress the friends and relatives...) Let me know and I'll see what I can do! (It might get you a gratitude-inspired plate of chocolate chip cookies in the mail!)
I had two different questions come to me as a result of last week's post, and so I'm going to try to answer those, here. One of them had to do with the different ways white sugar and brown sugar act in the cookies (I mentioned that in one of last week's videos, and Christopher took me up on the option of explaining the difference). The other question had to do with greasing the cookie sheets (which I'd never really thought about before).
Let me explain:
Okay. So now that we're all up to speed, let me say that because we're working on the same recipe as last week, I'm not going to have as many photos, here, as I did last week. But, so you don't have to flip back and forth between open tabs, here are the recipes once again:
This one is more important this week, since we're actually going to be making these, too!
Time to get out your 3/8-cup measure!
Starting out by making the Sugar Jumbles (the "key" recipe, above), I pulled together the ingredients, as usual.
(There was also salt, but it was fixing its hair and missed the group photo.)
Two things about this photo:
Is it just me, or does it look like we're missing ingredients? There's so little there!
Yes, that's right: The vanilla is missing, but there is rosemary on the stack.
Wait. What? Rosemary? Where did that come from? Let me explain:
(Believe it or not, this was the least bad of my three "thumbnail" options.)
So, yeah, rosemary.
I realize that, if you watched the last video, you don't need to see this photo. But I thought it turned out really well, so I'm including it.
Once everything was mixed, I got out my handy small scoop and went to it pretty quickly. One difference between this dough and the chocolate chip cookie dough (aside from the obvious fact that it is a lighter color than the dough with brown sugar in it) is that the dough is "softer" than the other.
I made quick work of the scooping and popped these into the oven so that I could start on the second batch of cookies. About 8 minutes later, I checked the oven.
They did get the "delicately browned" look that Betty Crocker promised. And they looked really kind of adorable and puffy.
Out of the oven, they stayed puffy, and I even checked them with a fingertip to make sure that they were done.
With the Rosemary Sugar Jumbles out of the oven, it was time to turn to the next question: Why does the recipe say to grease the pan?
Since we went over the full recipe last week, we'll skip the full dough-making, and move straight to the baking - or at least the pan prep.
I opted to make sure that the cookies were completely even in other ways, so instead of having to wonder whether oven placement made a difference, I opted to put them all on one pan.
In case you couldn't guess, the greased side is on the right.
I opted to cut back on the number of cookies on the pan, so that I could easily keep them on their own sides.
Those went into the oven, and then it was time to start taking a closer look at the Rosemary Sugar Jumbles:
The timer mentioned in the video yielded this pan of cookies:
Again, the greased side is on the right.
I got down close to look at the pan, and the browning seemed to be equal on both sides. The "spread" also seemed to be un-impacted by the greasing.
This is what I get for baking on a sunny day - a massively backlit photo.
No obvious differences from the top made me wonder about the bottoms.
They look a little like mini chocolate chip pancakes, don't they?
They looked identical from the bottom, as well.
The only thing that did seem different was the way they released from the cookie sheets. The greased side of the pan released more easily (not a huge surprise), while the ungreased side didn't do badly, but did give some resistance.
Once again, the greased side is on the right. (I have no idea how I was able to remember to put it on that side for each photo.)
Remember how I commented that the cookies made with white sugar stayed "poofier" than the ones with brown sugar? Here's some proof:
Oh, and the color difference of the dough got really obvious when they came out of the oven:
Not gonna lie: I think that I've found the perfect set of cookies from the same basic recipe. One "traditional" and chewy and chocolatey, and one slightly cake-y and crisp around the edges and with a definite herbaceous overtone that I think I might start obsessing over by the time you guys are reading this post.
So, what did we learn, overall? Let's summarize:
Note to self: Smaller bites next time!
Okay. Now it's your turn: pick your drink and dunk away!
***** So, what's next on my blogging agenda? Your guess is as good as mine. (Well, almost...) If you have anything you're unsure of in the kitchen - either a recipe or an ingredient - let me know and I'll see what I can do so we can all learn more about it!
I saw something posted on social media, recently, that asked "If Cinderella's shoe was a perfect fit, why did it fall off?"
It's an interesting question in and of itself, but it also got me thinking, once again, about choosing a "perfect" editor (or proofreader, or ghostwriter, or general contractor, or spouse...). What do you do if the one in front of you isn't the one?
It's been a while since we talked about choosing to work with someone on your manuscript. In a lot of cases, it's hard to really tell what the person will be like to work with until you're in the middle of the work.
This is why working together on a sample chapter or something of that type can be a good place to start. It's a little like on-line dating: you start out knowing nothing about each other, you correspond for a while, then - if everything goes well - you have a first date, and if that goes well then you consider another date (and so on). And you can edit happily ever after.
On the other hand, there are a lot of people who "date" on apps that are pretty much one-and-done, and there are a lot of people who hire freelancers that way, too. A number of websites match up freelancers and authors with little more than "Can we get it done in the time we have?" and "How do I pay you?" - not exactly phrases that bring to mind a great relationship. Though, we've probably all used those sites at one time or another, and they're good for what they are.
When you decide to create a working relationship to move your manuscript forward, however, you need to be sure you're both compatible. This could be as simple as verifying you both use the same style guide, that you both feel the same way about the Oxford comma, or that you both use the same version of the English language (American versus British versus Canadian versus...).
There can be other issues, though. While you're building your working relationship, many of these topics should be discussed in advance, and some might be deal breakers, depending on how you both feel:
Do you both understand the market being written for? (Will your editor know the youth market as well as you do? Will your editor understand the jargon of the business you're writing about?)
Do you both hold the same political/social/etc. views? (An editor with a contrary view might yield a rocky relationship, but might also be very helpful in giving counter-arguments and adding depth to your discussions.)
What are the timelines you're working under - and can your freelancer meet them? (If an experienced freelancer tells you that you're expecting too much work in too little time, he or she probably has a reason for saying so. But, at the same time, if he or she says "no problem" then you need to both be on the same page.)
And, of course:
What are you willing and able to pay - and can the freelancer work within that framework? (Relationships and money... now that's a tale as old as time.)
If you do your due diligence, and if you and your prospective partner give honest answers to the questions that are raised, you should both know where you stand when you start on your project - or when you decide to say "No, thank you" and move on.
And if you find out that you aren't a match? Remember to keep this polite. Although it's a much more personal process than, say, an oil change, it is still a business transaction - and should be treated as such.
Consider finding a freelancer to work with to be more like a trip to a shoe store, and less like a trip to the ball. And remember: even the shoe that looks perfect might not fit once you try it on, but don't worry - there are a lot of other shoes in the store.