Sunday, April 12, 2020

Raised Doughnuts! (Eventually...)

In my quest to use the yeast that we bought a couple of weeks ago - and also in an attempt to work my way through learning some bread-related techniques, I decided that it might be fun to celebrate Easter with doughnuts.

I even committed to getting up early to make them so that we could have them for breakfast (since we're planning to just have a big afternoon meal, and not three squares today). I figured I'd get up around 7, and we'd be good to go by around 9:30 or so. (Let's just call that foreshadowing by an unreliable narrator, shall we?)

Don't get me wrong. We did have doughnuts for breakfast. It was just a tad later than we'd expected. But here's what it was like when I started at about 7:25:
I kind of half apologize in advance for the Easter pun.

This is where I would usually post a photo of the recipe, but this time I'm just going to link you to Alton Brown's recipe over on the Food Network website.

I'd also like to state at the outset that I made a half batch of the dough, instead of a full batch. As much as I could probably have eaten a full batch of these in one sitting, I don't think that the two of us really needed that much temptation in the house when we're both working from home.


Not included in this photo are a few pieces of special equipment: thermometers for the water and the oil, and a doughnut cutter - or a biscuit cutter and a metal pastry tip...

Because we were doing the half batch, some measurements got a little odd. Like trying to figure out how to do half of 1/3 cup of shortening:
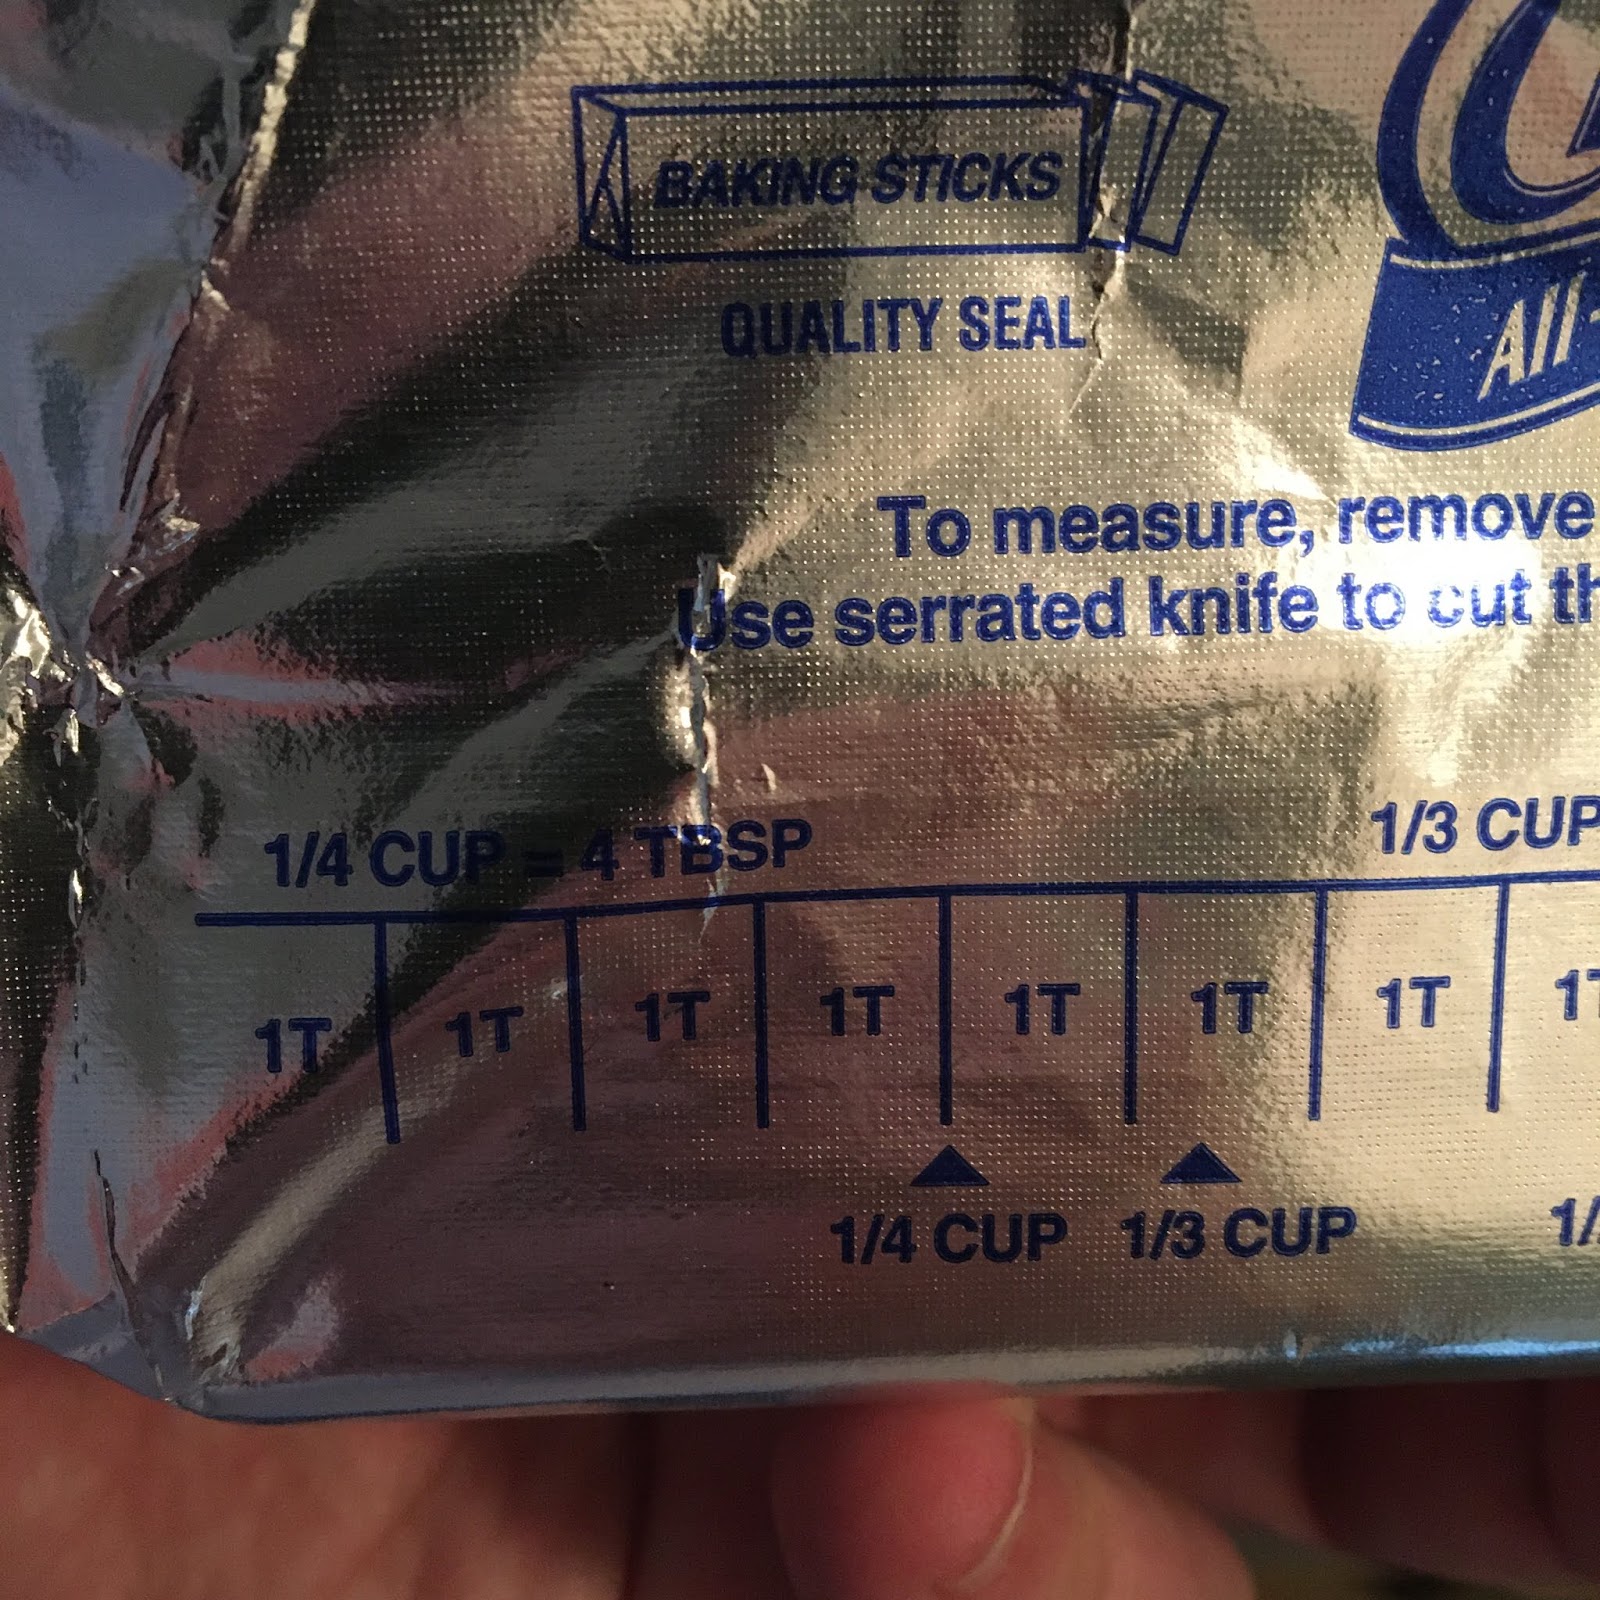
Can you see the puncture mark I made in the foil before cutting into the stick? 
The first real step of the recipe still confuses me a bit, even after doing it. You're supposed to warm the milk on the stove until "just warm enough to melt the shortening" and then pour the milk over the shortening in a small bowl. (Prepare yourself for exciting action shots...)

1/6c of shortening:


3/4c milk heating on the stove:

Please ignore the splatter on the stovetop. At 7am, I really didn't care enough to clean before taking that photo.
Looking at it at this point, I'm really not sure why we couldn't just put the shortening in the pan and heat it until it melted.


1/6c of water, between 95 and 105 degrees Fahrenheit:
It was beginning to feel a bit "Mr. Science" around this point.
The equivalent of one packet of yeast (2 1/4 tsp), sitting in the warm water to dissolve/bloom, and the shortening/milk, which I had to put into a bowl with cold water to try to get it cool enough that it wouldn't immediately kill the yeast:


Thankfully, we have a digital kitchen scale, because otherwise trying to figure out 11.5 ounces of flour would have been a bugger.


As someone who usually bakes things that are wet ingredients in one bowl, dry ingredients in another, it was a little strange to me to just dump the milk/shortening, yeast/water, nutmeg, sugar, salt, and half of the flour into the mixer all at once. But that's what the recipe said to do, so...


After the first half of the flour went in, it was still pretty liquidy:


But the second half of the flour gave us a sticky mess (which I knew meant we were on the right path):

I switched from the flat beater to the dough hook and let it run for a couple of minutes, then stopped it to check on it, and found this:
Definitely not "pulling away from the edges" or "smooth." 
So I turned it back on and let it run. The recipe said to go for 3 or 4 minutes, but it took about 6 minutes to get it to this point:
I wonder if, had I done a full batch, it would have come together a little better. As it is, it seemed to keep leaving some in the bottom of the bowl. 
Covered with one of the beeswax cloths, and up it went onto the top of the fridge for an hour.

If you've been following my blog for a while, you know that I'm a huge fan of recipes that don't take a lot of prep and that don't use a lot of dishes. In large part, that's because we don't have a dishwasher, and I don't like having a messy kitchen.

This recipe is not one of those "self-tidying" recipes. At this point in the process, my counter looked like this:
I would be yelled at by any of the "chef mentors" on most cooking shows because it was so messy. But, honestly, I was working the full time on doing things, and didn't have much time to clean until I got to this point.
An hour (and some kitchen tidying later), the dough had risen to this:
Definitely a good doubling in size. Although you can't tell in this photo, it actually puffed up enough to stick to the wrap on top. 
If you look closely in the top section of the photo you can see where it got stretched when I took off the cover.
Rolling it out was really easy. I honestly had thought that the dough might put up more of a fuss. But it was done before I had really started - and, frankly, I might have rolled it thinner than the recipe wanted.

Next up was the cutting of the donuts. The recipe says to use a 2 1/2-inch doughnut cutter. We don't have one of those. What we do have are biscuit cutters. So I started with just making the outer circles, and then had to figure out what to use for the inner cutter.

The first thing that I found that was round, small - and relatively sharp - was metal pastry/frosting tips.
Honestly, the size was about perfect. The only trouble was getting the "hole" out after you punched it.
The whole batch, according to the recipe, is supposed to make 20 to 25 of the 2 1/2-inch doughnuts. But I made 10 of that size PLUS 3 larger donuts out of my first rolling of the dough:

By the time I was done, I had about a dozen of the "small" ones and another half dozen of the large ones, plus all of the doughnut holes and some leftover bits.
In other words, a half batch was definitely the right way to go.
At this point, it was time for another 20-minute rest under a tea towel.

Finally, with the cover off, they were all kind of pillowy and ready to fry.

My oil was up to about 365F - perfect.
As you can see, Christopher had already gone through over half of his coffee by this point. This is when it started to feel like these had taken forever. 
The first doughnut went in on its own - just in case I had done anything horribly wrong. About a minute on the first side, with its bubbles propelling it around the pan.
I use a deep sauté pan for frying, typically (as I did this morning), though the recipe recommends a Dutch oven if you don't have a deep fryer. Because the temp kept fluctuating as I fried, I think that a cast iron Dutch oven might have been a good idea - it would hold the temperature a bit better than an open pan like this.
 After the first minute, doughnut number one got flipped. And... oh... it smelled so good!

In the meantime, I had poured some sugar into one bowl, and made a quick glaze (powdered sugar and milk - just slightly thicker than you might think it should be).

I used a long spatula for the flipping and the removing from the pan. You do want to try to let the oil drip off before moving on with them. 

The first doughnut went into the sugar, which you want to do while they're still warm so that the sugar sticks to the doughnut. 

Then I started going for larger batches (and turning the heat on the pan up and down to try to stay close to the magical 365 marker on the thermometer).

Something I learned today: doughnut holes don't like to be flipped over once they've started to cook. The browned sides tend to want to stay down, and the light side (presumably airier and lighter) stay up. I did find, eventually, that if you allowed them to stay along the sides, they were more prone to stay flipped when you maneuvered them.

I don't have any action shots of me dipping the doughnuts into the glaze. Here's the thing, though: unlike the sugar ones, you need to let the ones you're going to glaze cool just ever so slightly before dipping them into the glaze. Why? Well, for one thing, I was using my hand and I didn't want to burn myself. But the glaze will also melt and completely run off if the dough is too hot.
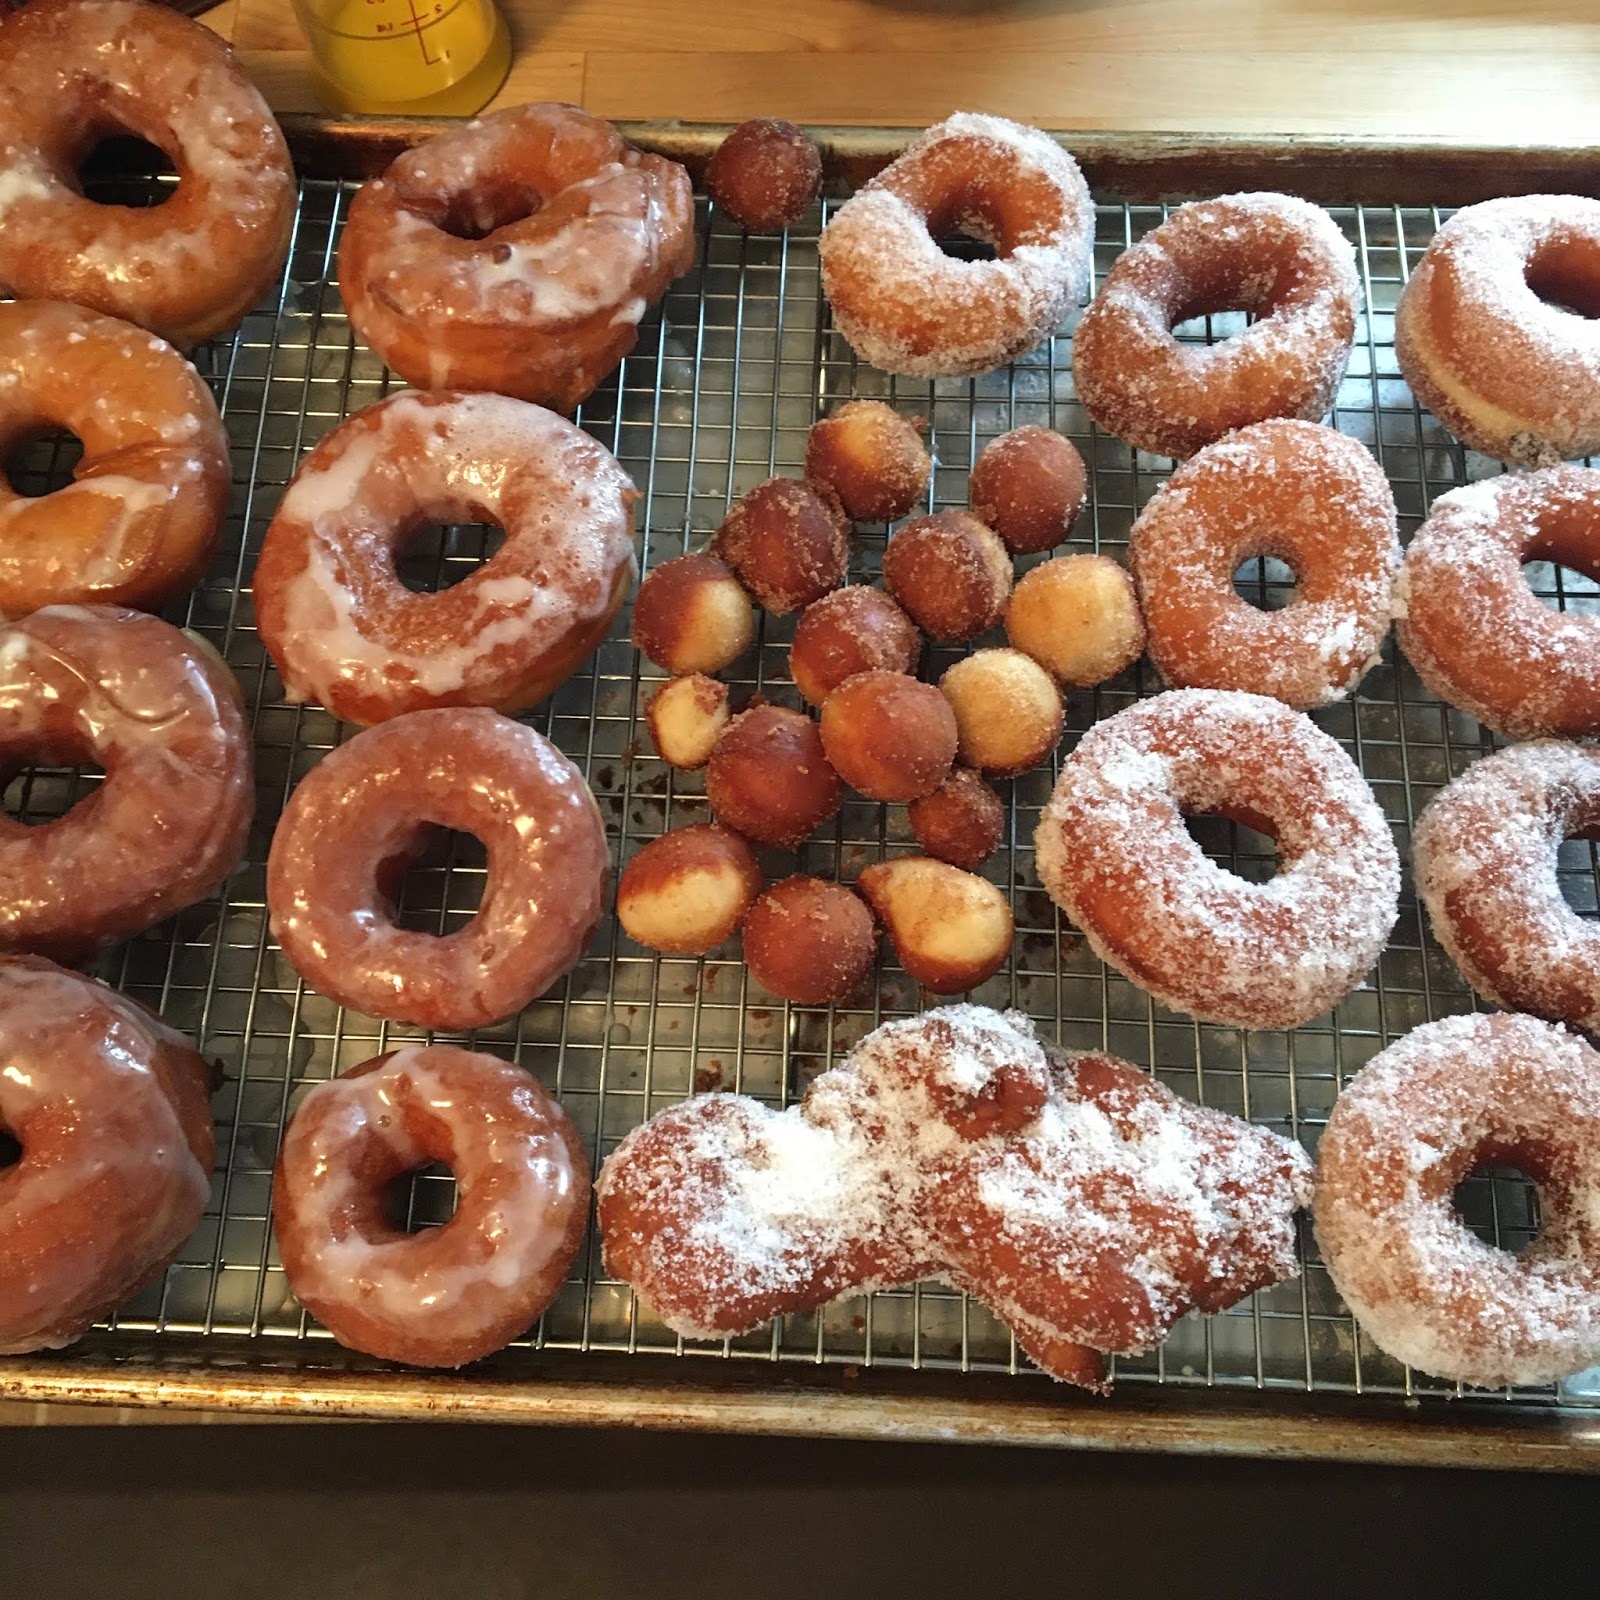
The monstrosity at the bottom of the photo was made of all of the last cuttings from the doughnuts, when I didn't feel like re-rolling. Honestly, due to all of the nooks and crannies, it got a really good, crispy outer shell - and it held a LOT of sugar!
So, they look like they're supposed to look, but how were they?
For once, a thumbnail that actually explains the video!

Apparently my phone was frustrated with having to do so much early morning work on a Sunday, though, so here's my wrap-up wrap-up:

The verdict from Christopher was that the crispy outer edge was great, and the inside of the doughnut was actually a very good texture. His one callout was that the dough wasn't as sweet as he might have expected - but had we glazed the all around (instead of just on the top) that might not have been a problem.

And, to answer my own question from the video, above: Yes, the larger ones were a slightly better texture than the smaller ones.


As for the snow I was mentioning, here's what it looked like outside at about 12:30 this afternoon:
Yesterday, the grass was all greening up for spring. As I'm finishing this write up at about 2pm, the sidewalk and street are no longer melting - it's all white out there.
OH - And part of why I was frustrated by the timing on these doughnuts was that I had initially planned to do a chocolate glaze. But to do that, the main recipe says you should let the doughnuts cool for 20+ minutes, and then once you put the glaze on them, the glaze is supposed to set for half an hour. So, although I got out all of the ingredients (below), I just didn't want to add another hour to the time.

-----
So... Who wants to make bets on what my next yeasty adventure will be? Any guesses? I have a pretty good idea, but you'll have to wait to find out. (And I might change course, depending on what you all vote for...)

Monday, April 6, 2020

I'll Learn Something New Next Week (aka "The Yeast Will Wait")

After last week's successful bread-making, I was all set to do more. I wasn't sure what "more" was going to look like, but I started casting around for ideas. And I found some great recipes to try this weekend.

And I even found somewhere that I could buy a large amount of yeast - which has been such a hot commodity lately. (In case you're wondering, I found it at The Golden Fig in St. Paul, MN - an amazing specialty food shop that we love visiting in the best of times, and where the world seemed to be alright for the half hour that we shopped last week. Not to foreshadow too much, but it was "comforting" to be there.)

But, well, the weekend came and I really just wanted to not deal with hours' worth of working on yeasted doughs that might or might not turn out. I bake to relieve stress (which, when we're both going to our offices has a tendency to make our coworkers very happy), and I realized that I wanted to make something tried and true.

I did *not* drink out of the jug. I promise. (I honestly just don't have that much dexterity.)
So (as you might have guessed from the photo above) I dove back into a recipe that first appeared on this blog in September of 2017: Betty Crocker's 1950 Chocolate Chip Cookies.

Basically, I wanted some "comfort" in my baking this week. Let me explain.

I really look half asleep in that screengrab, don't I? 

If you didn't watch the video (I know not everyone does), you will have missed my quick and easy tip for refreshing cookies which have dried out. I got it from a friend of mine a number of years ago. I don't know why the chemistry works, but it does. (No - I'm not telling you the tip. You're going to have to sit through the video if you want to find out.) If you *did* watch the video, I feel I should mention that I only put that slice in for about a day prior to the video.

As for my foray into yeasty baking... I do plan to try to tackle more yeasted bread products next week. I'm sorting recipes and figuring out which one(s) to attempt first. I just need to get myself into the right headspace before trying something that might be a spectacular flop.

In the meantime, since we're talking about comfort, and since I only have the one new photo of cookies to share, I offer you this photo of a sleeping Cocker Spaniel. May we all feel that level of peace and calm sometime in the coming week.


-----
Donuts and croissants and pain au chocolat - oh my! I wish I could give you a teaser of what I'm going to make next week, but I really have no idea. 
What's happening in your kitchen? 

Monday, March 30, 2020

Apparently This Was a Bread Weekend

I realize that a lot of people are now at home and realizing for the first time that they have kitchens. These seem to be the people who have caused the stores to be out of flour, sugar, and eggs.

As someone who bakes and cooks regularly, I'm mostly happy for these folks - because I think a lot of them will enjoy the kitchen.

At the same time, I have to admit that I'm a little worried for a few of them (I know some people who are just discovering their kitchens - and maybe would have been better without that discovery). And - honestly - I'm also a tad frustrated with how hard it's been to find those basics in the stores.

But I am happy that people are trying new things - and so I thought I should, too.

And, since we do happen to have some bread flour and yeast in the house and - since I wasn't going anywhere this weekend - I decided to try making a kneaded yeast bread for the first time.

(Spoiler alert... it went pretty well...)


It's been a while since I've posted (as some of you have been kind enough to mention), and so I don't remember exactly how this all goes, but I guess I should add a video intro about here...

Just a basic heads-up: The first video in this post comes in at just about 6 minutes long (the others are MUCH shorter). I cover a lot of ground in this one, though: what was going on when I last posted (January), what I've been doing since, who gave me the book I'm holding, and - oh, yeah - some stuff about why I'm baking the recipe I'm baking. I think it's worth it, but obviously it's up to you.  

So... "Strange world" is probably a bit of an understatement these days, right? But spending some time in the kitchen can definitely be a great way to work on some relaxation. (Unfortunately, it's gotten a tad difficult for me to spend much time in my other favorite place - the grocery store.)

I looked through some cookbooks for a basic bread recipe, and kept finding things that had all sorts of exciting, exotic ingredients - which we don't have on hand. But I found a 4-ingredient bread recipe in Appetite by Nigel Slater:

I admit that I did something with this recipe that I pretty much never do: I only did a half-size recipe. I figured it didn't make sense to do a full batch if we were going to end up with 2 loaves of bread we didn't want. 


So... four ingredients:
By the way - 1 packet of yeast is equal to 2 1/4 tsp of yeast. 
And a big bowl to put them in:

The next steps deal with mixing. And since I was about to get my hands dirty with the kneading, I figured I'd just go in hands-first:
Dry ingredients...
The recipe talks about only putting in "most of" the water, so I started out with 1 1/4 cups out of the 1 1/2 cups.

Mixing that in, though, didn't give me the "sticky dough" that the recipe talked about:

I added a bit more water, little by little, ending up with about and extra half cup on top of the initial 1 1/2 cups - which gave me this sticky mass:


Flour on the board:

Dough on the board:

Kneading the dough:

I really like that Slater says that you don't need to beat up on it, and that if you end up exhausted you were doing it wrong. Honestly, I stared out the window and kneaded it for 10 minutes. It was kind of awesome.
About halfway through, it was already starting to look more like bread dough:

Since the recipe talks about the dough doubling in size, I did a quick measure before I put it into the bowl.

This went into a bowl with a towel over it and onto the top of the fridge - the warmest place in our kitchen. 

Unfortunately, it was a rainy, chilly March day, and the house was only about 67 degrees. So even after leaving it for an extra half hour (so a total of about 1h20m), it still hadn't fully doubled in size.

I figured I didn't want to leave it in the first proofing stage for much longer, so I went ahead and flipped it out onto my floured board, kneaded it for about another 2 minutes, then plopped it onto my baking sheet.

For this proofing, though, I moved it to the top of the stove - which had already started preheating.

That move was definitely worth it. The dough easily doubled while it was there.

I decided to try cutting a basic design in the top, once I got it kind of "grouped into a high ball" as the recipe suggested, and then figured it was on its own as I put it into the oven.


I know... I know... I know... I'm not supposed to open the oven door and take photos. But I was so happy to see that it had risen!

After the 10 minutes at 500 degrees, and 25 minutes at 425 degrees, I pulled it out of the oven to flip it over and see whether or not it was done.

The bottom wasn't much to look at, but... well... you gotta hear this:

So... We've listened and waited, and now - finally - we get to cut into it.


So, how was it?

And it was really pretty when I put it out, too:


Overall, it was pretty good. I'm not sure about the really thick crust - and whether that was on purpose, or something that I did.

I will say that Christopher and I both enjoyed it with our dinner, and I'm sure we'll enjoy the rest of the loaf over the next few days.

Here's the book that the recipe came out of. SUCH a great read!
And I'll also say that it was great to take the time to try something new - I hope you're all taking the time to try new things these days, too. (Or not - I mean... whatever makes you feel better in the long run.)


*****
So, what are you up to in the kitchen these days? Is there something you'd like me to attempt so you have some idea how it goes? Or just a question about what to do with the ingredients in your kitchen? Let me know and I'll see what I can help out with!